The FreedomFi Gateway is a multi-protocol miner for the Helium network. It comes with the ability to mine HNT for providing LoRa coverage, and is also expandable with plug-and-play support for Powered by FreedomFi certified Helium 5G CBRS Small Cells to mine MOBILE for providing cellular coverage and data for the Helium 5G network.
We know you are excited, but please follow the setup steps carefully. Report any problems to our support team.
Guide Usage
It is highly recommended that you open this guide on a computer or tablet, or print this guide out instead of following it on the smart phone that you will use to run the app and onboard the gateway.
Visit: freedomfi.com/start from a second device or you can print this guide.
It is highly recommended that you open this guide on a computer or tablet, or print this guide out instead of following it on the smart phone that you will use to run the app and onboard the gateway.
Start by downloading the Helium & FreedomFi apps
Step 1
Download the Helium & Helium Wallet applications
Helium App
Helium Wallet App
Step 2
Create or import your Helium Wallet
Open your Helium Wallet application and create a new wallet, or import your existing wallet. If you are unfamiliar with the Helium Wallet application, please take a moment to review the Helium Wallet Official Guide
Step 3
Gateway Installation and Placement
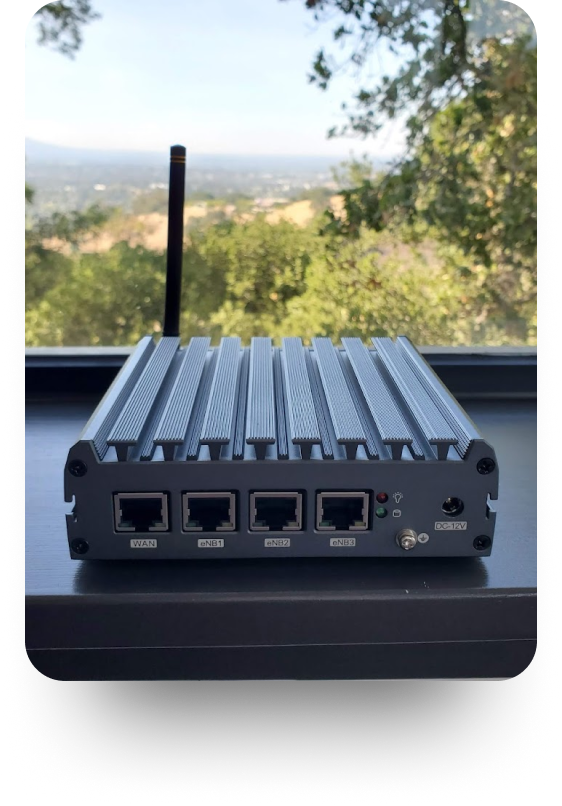
Before you start the onboarding flow, find a good location to place the FreedomFi Gateway, ideally so it has a clear view of the sky!
Obstructions reduce the antenna’s ability to communicate with the LoRa network and can reduce earnings and coverage.
Step 4
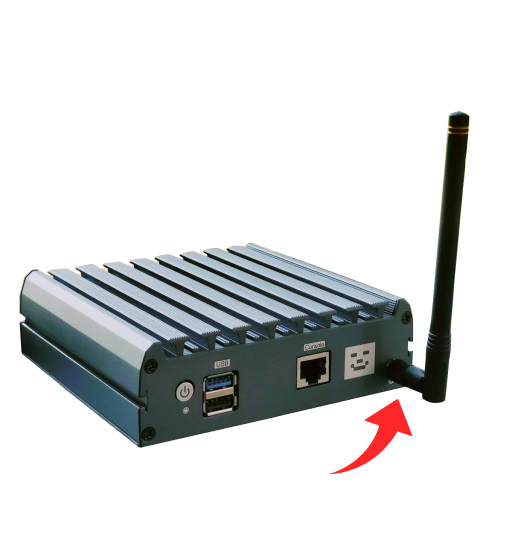
Attach gateway lorawan antenna
Make sure FreedomFi Gateway is powered off when connecting the antenna. Connecting or disconnecting the antenna to a powered device can cause permanent damage.
Step 5
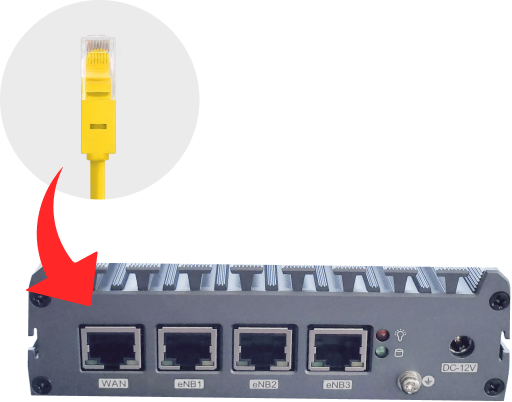
Connect gateway to the internet
Plug an ethernet cable (CAT6 or CAT7 is recommended) from your internet router to the port labeled WAN on the FreedomFi Gateway. It needs to be able to get access to the internet and DHCP from your internet router to work.
Step 6
Plug in power cable and power on the gateway
Next plug in the power supply into your wall outlet and the FreedomFi Gateway to power it on. A small red light will appear when it’s powered on.
DO NOT press the pairing button before the app tells you to. When you plug in power, the Gateway will automatically start booting without pushing the pairing button.
NOTE: The Pairing button light is always red… so red is good, it means the gateway is on!
Step 7
Gateway Onboarding
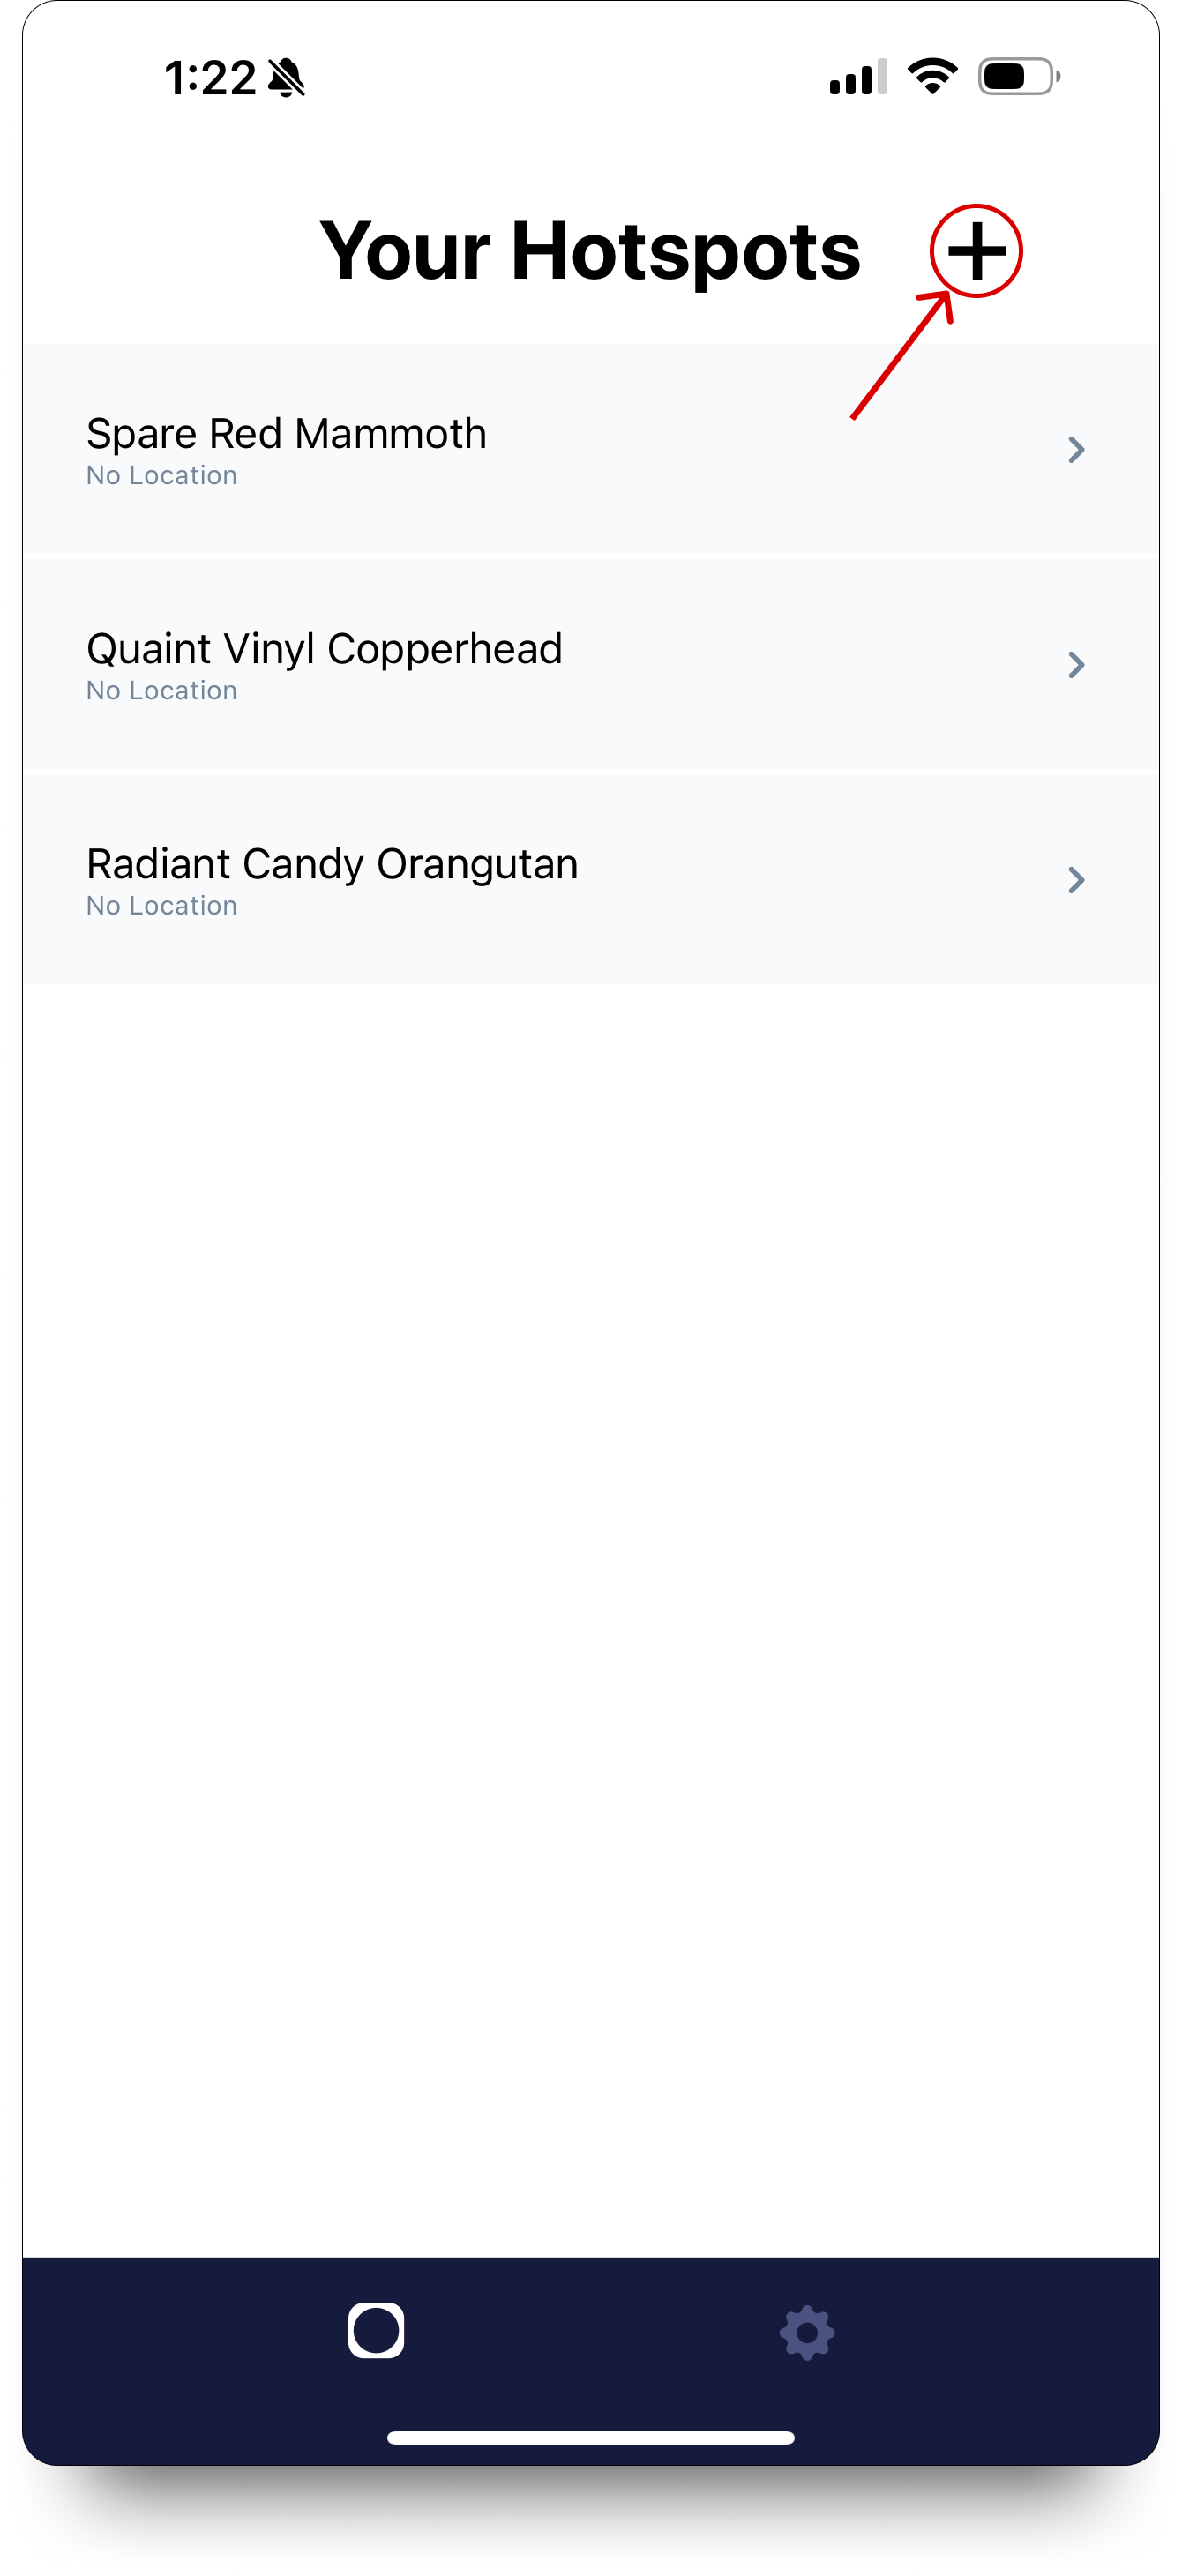
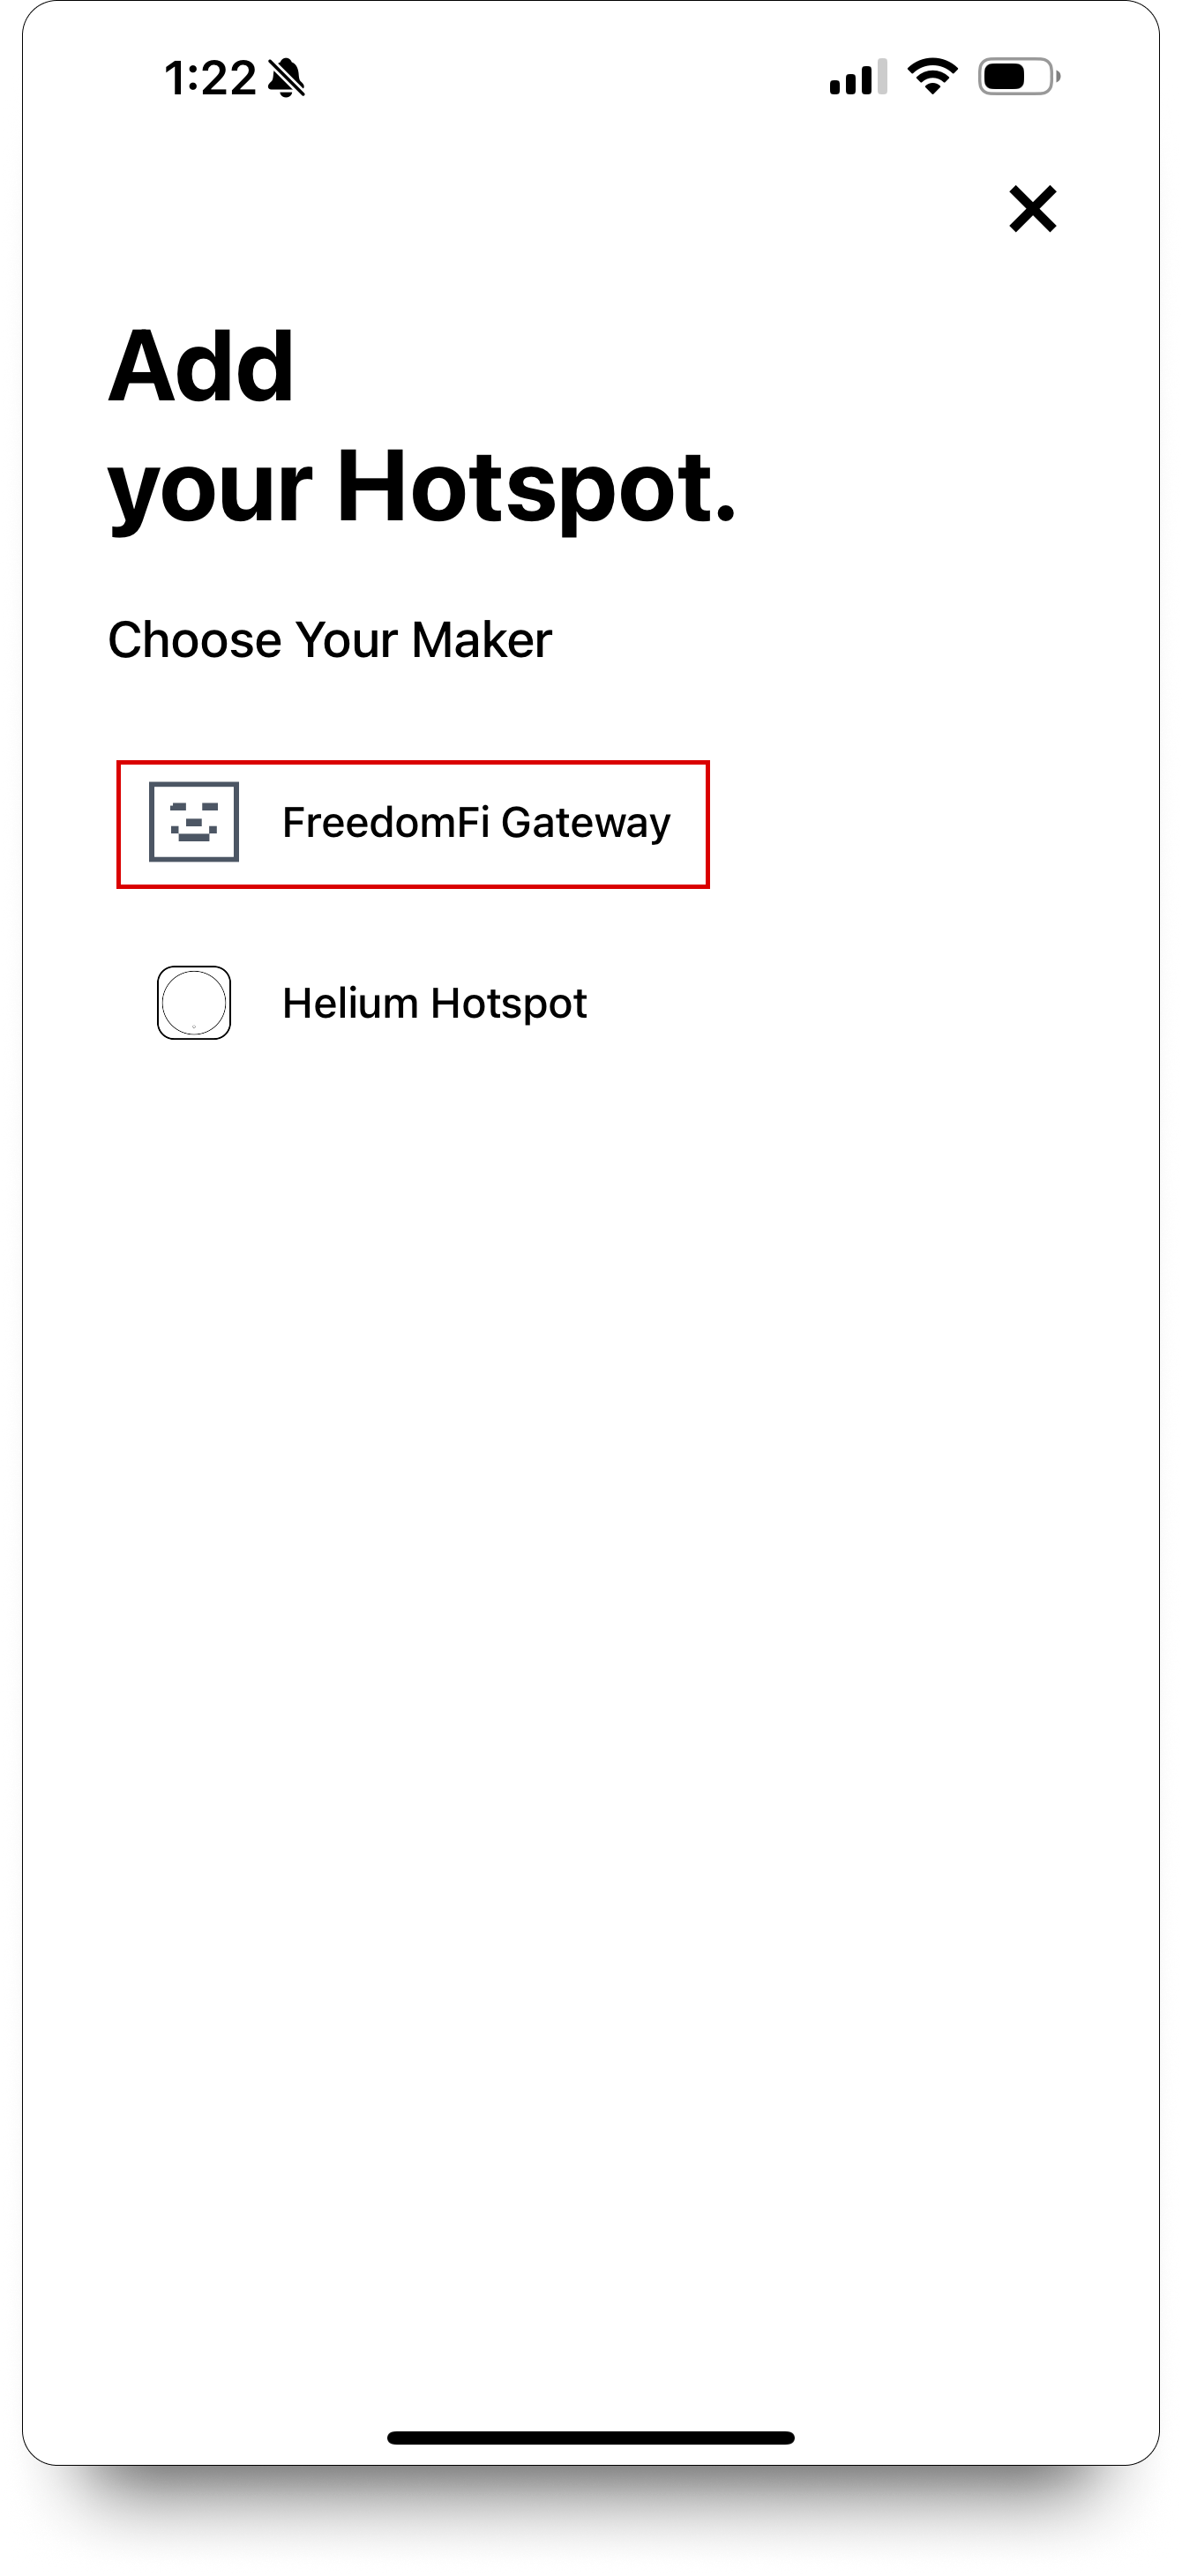
Open your Helium application and link your Helium Wallet, then click on the “+” on the homepage
Then select the “FreedomFi Gateway” option
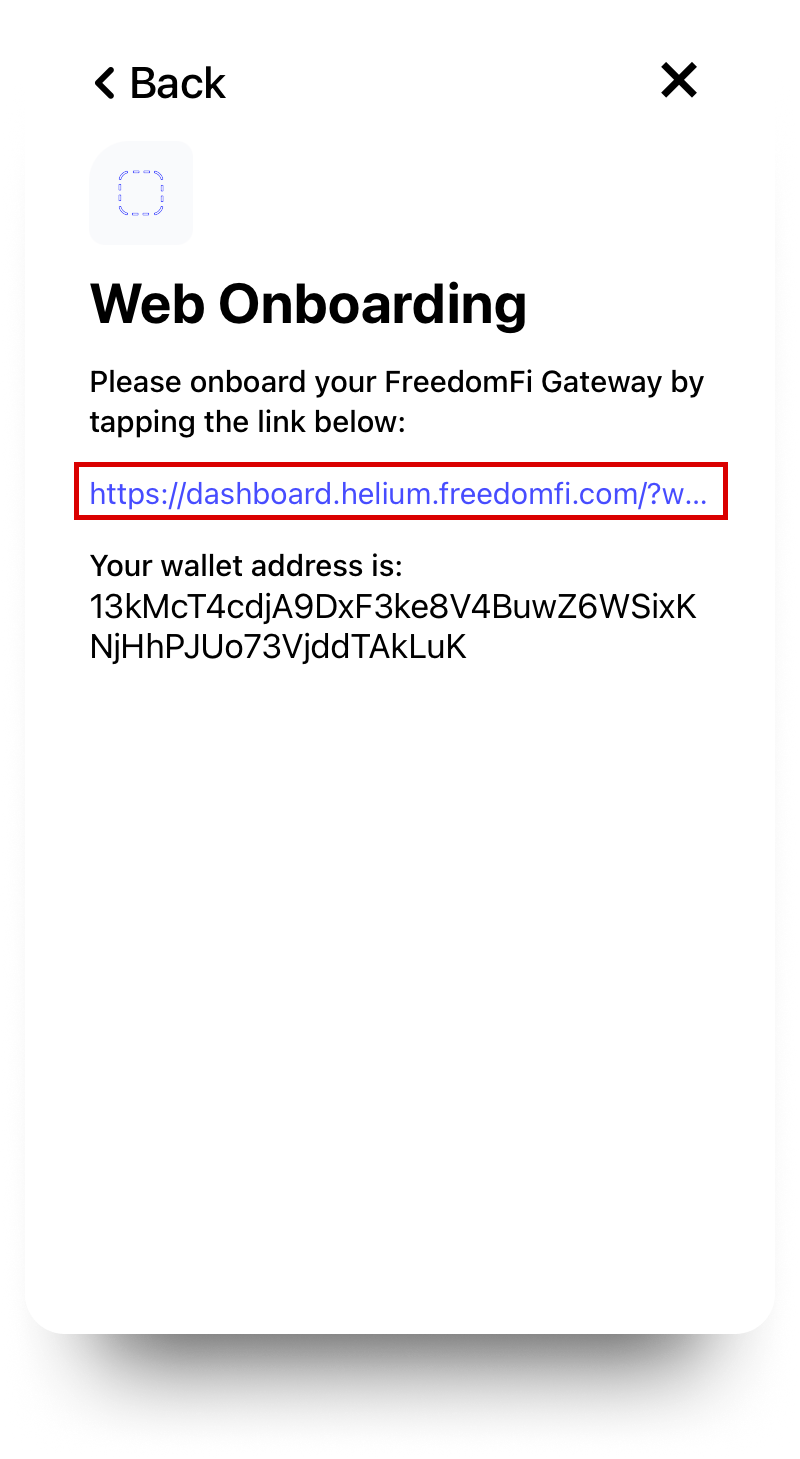
Click on the onboarding link that is provided
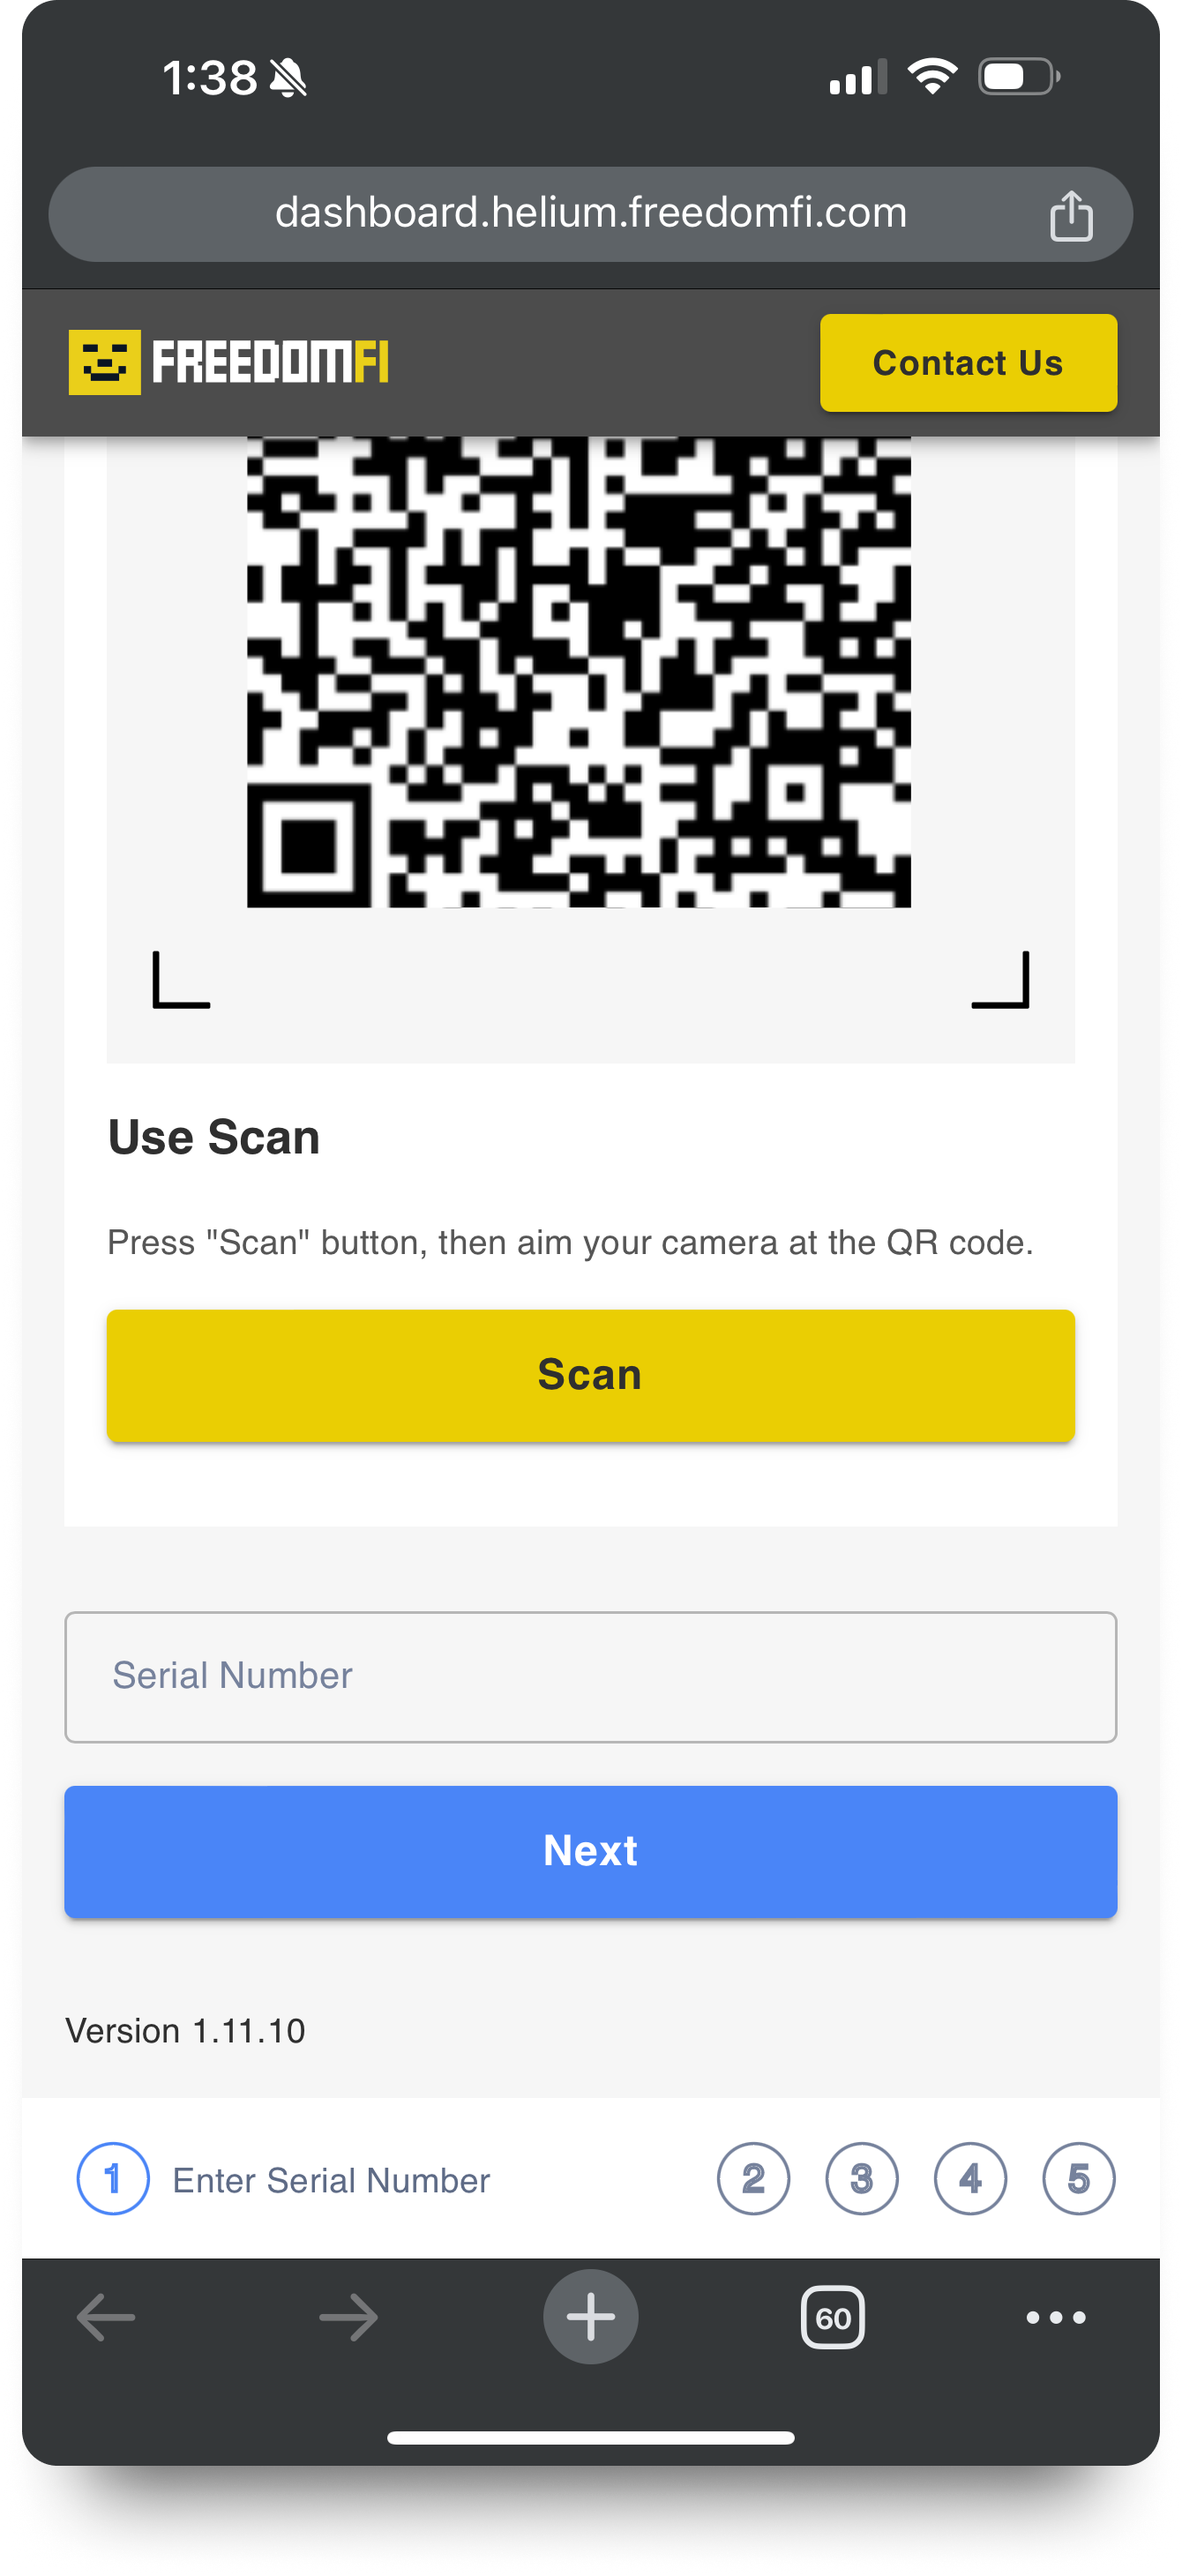
Step 8
Scan your FreedomFi Gateway QR code
Click the Scan button to launch the camera app. (You may have to grant your phone permissions to the app to have access to the camera in order to scan the QR code).
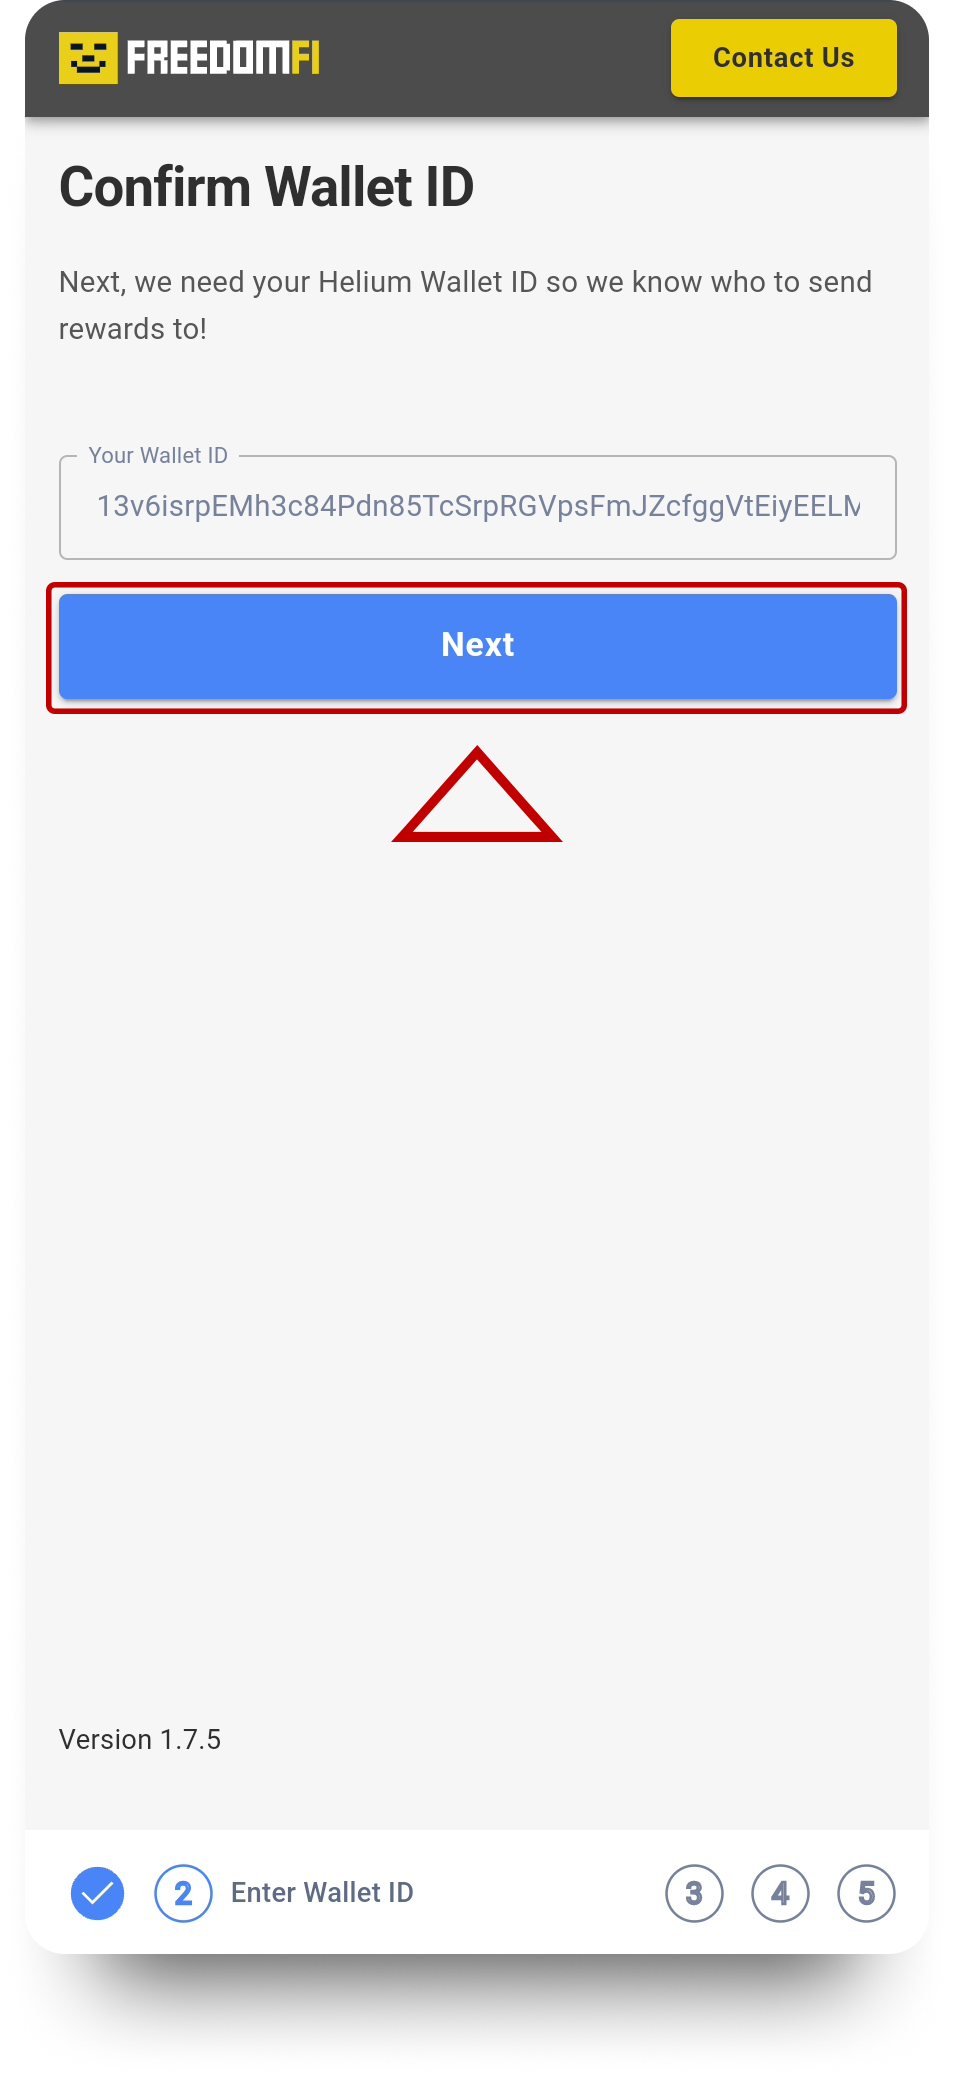
Step 9
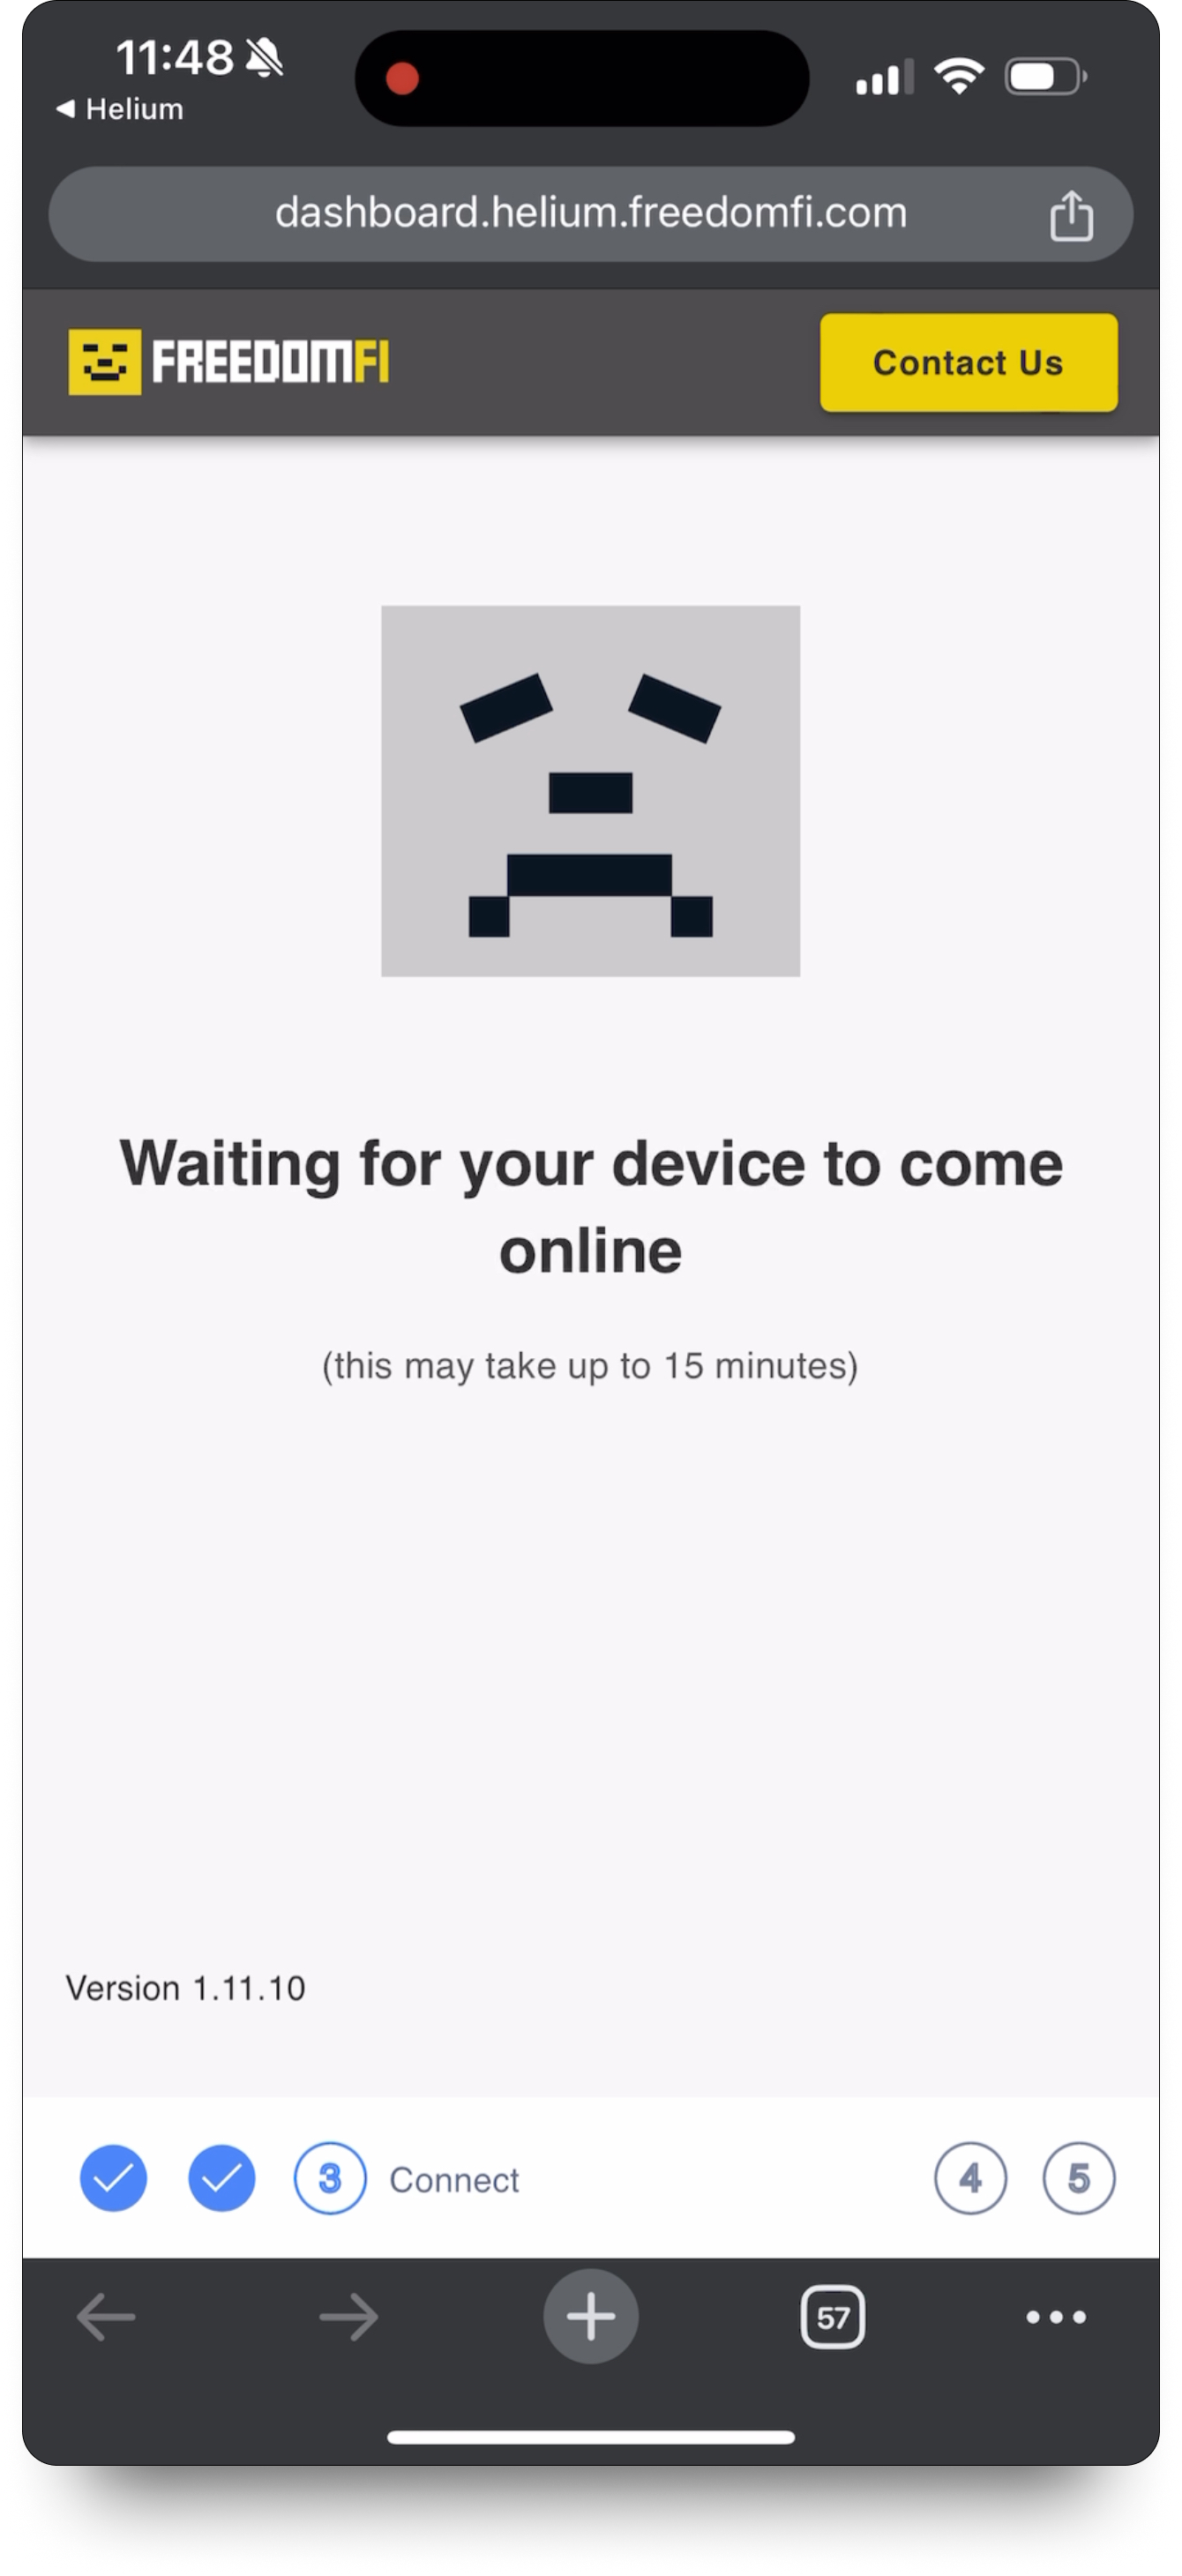
Confirm your Helium Wallet ID
Wait for your device to come online, typically this happens within 15 minutes, but in some cases can take a bit longer so be patient.
Step 10
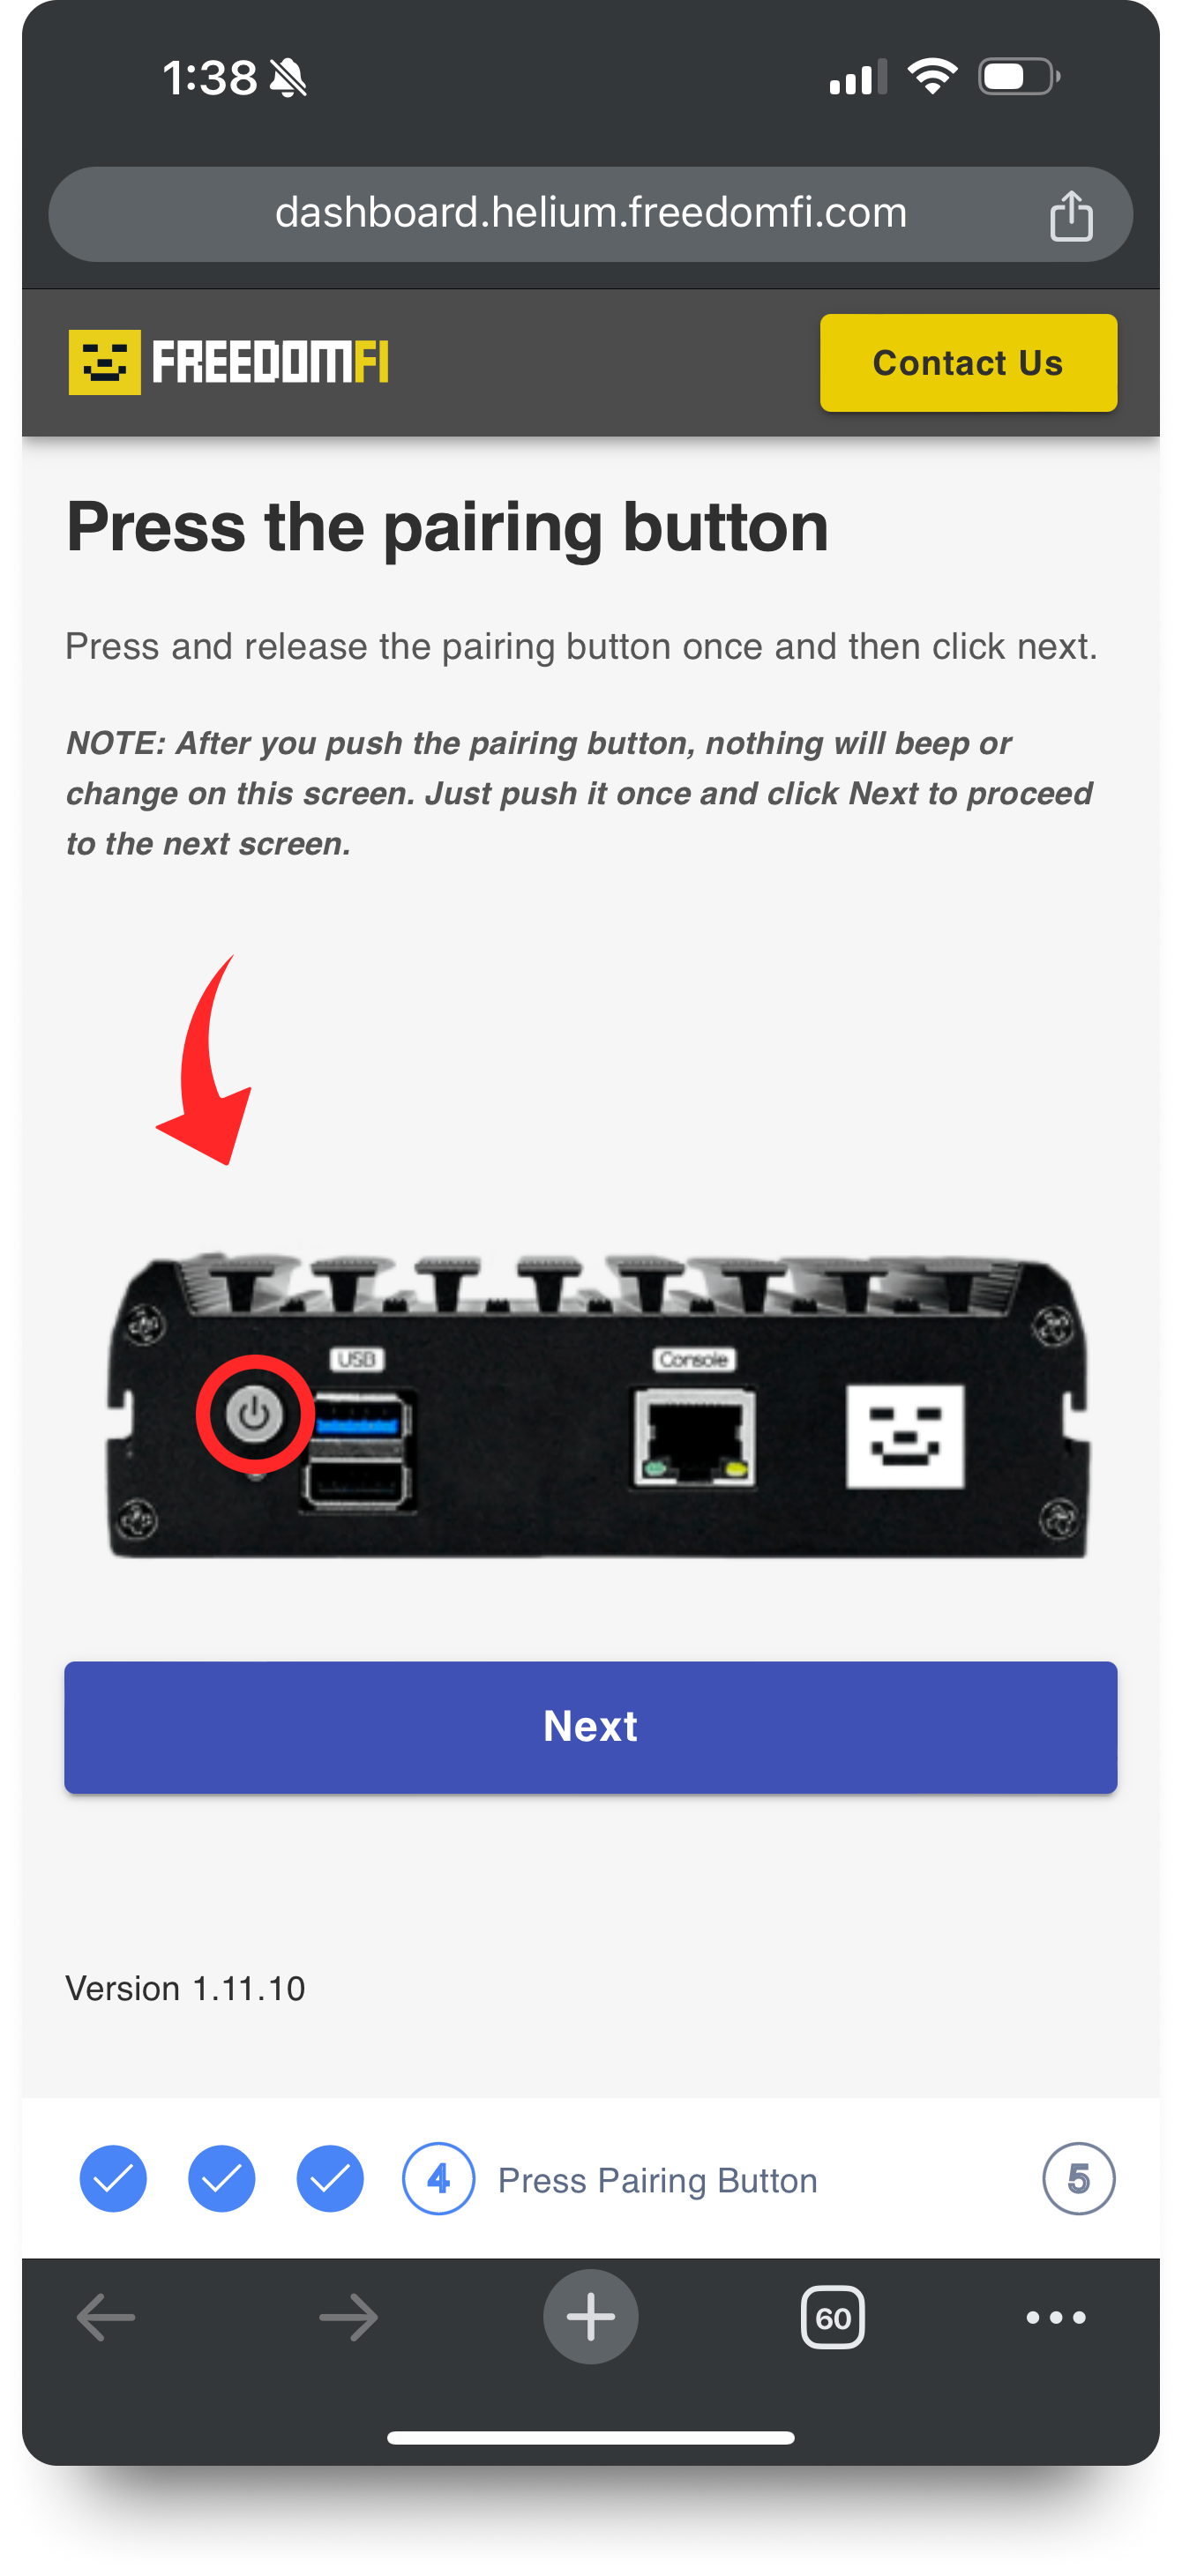
Pairing your FreedomFi Gateway
Once “Press the Pairing Button” appears on your phone as shown, quickly press and release the pairing button and then click “Next.”
Step 11
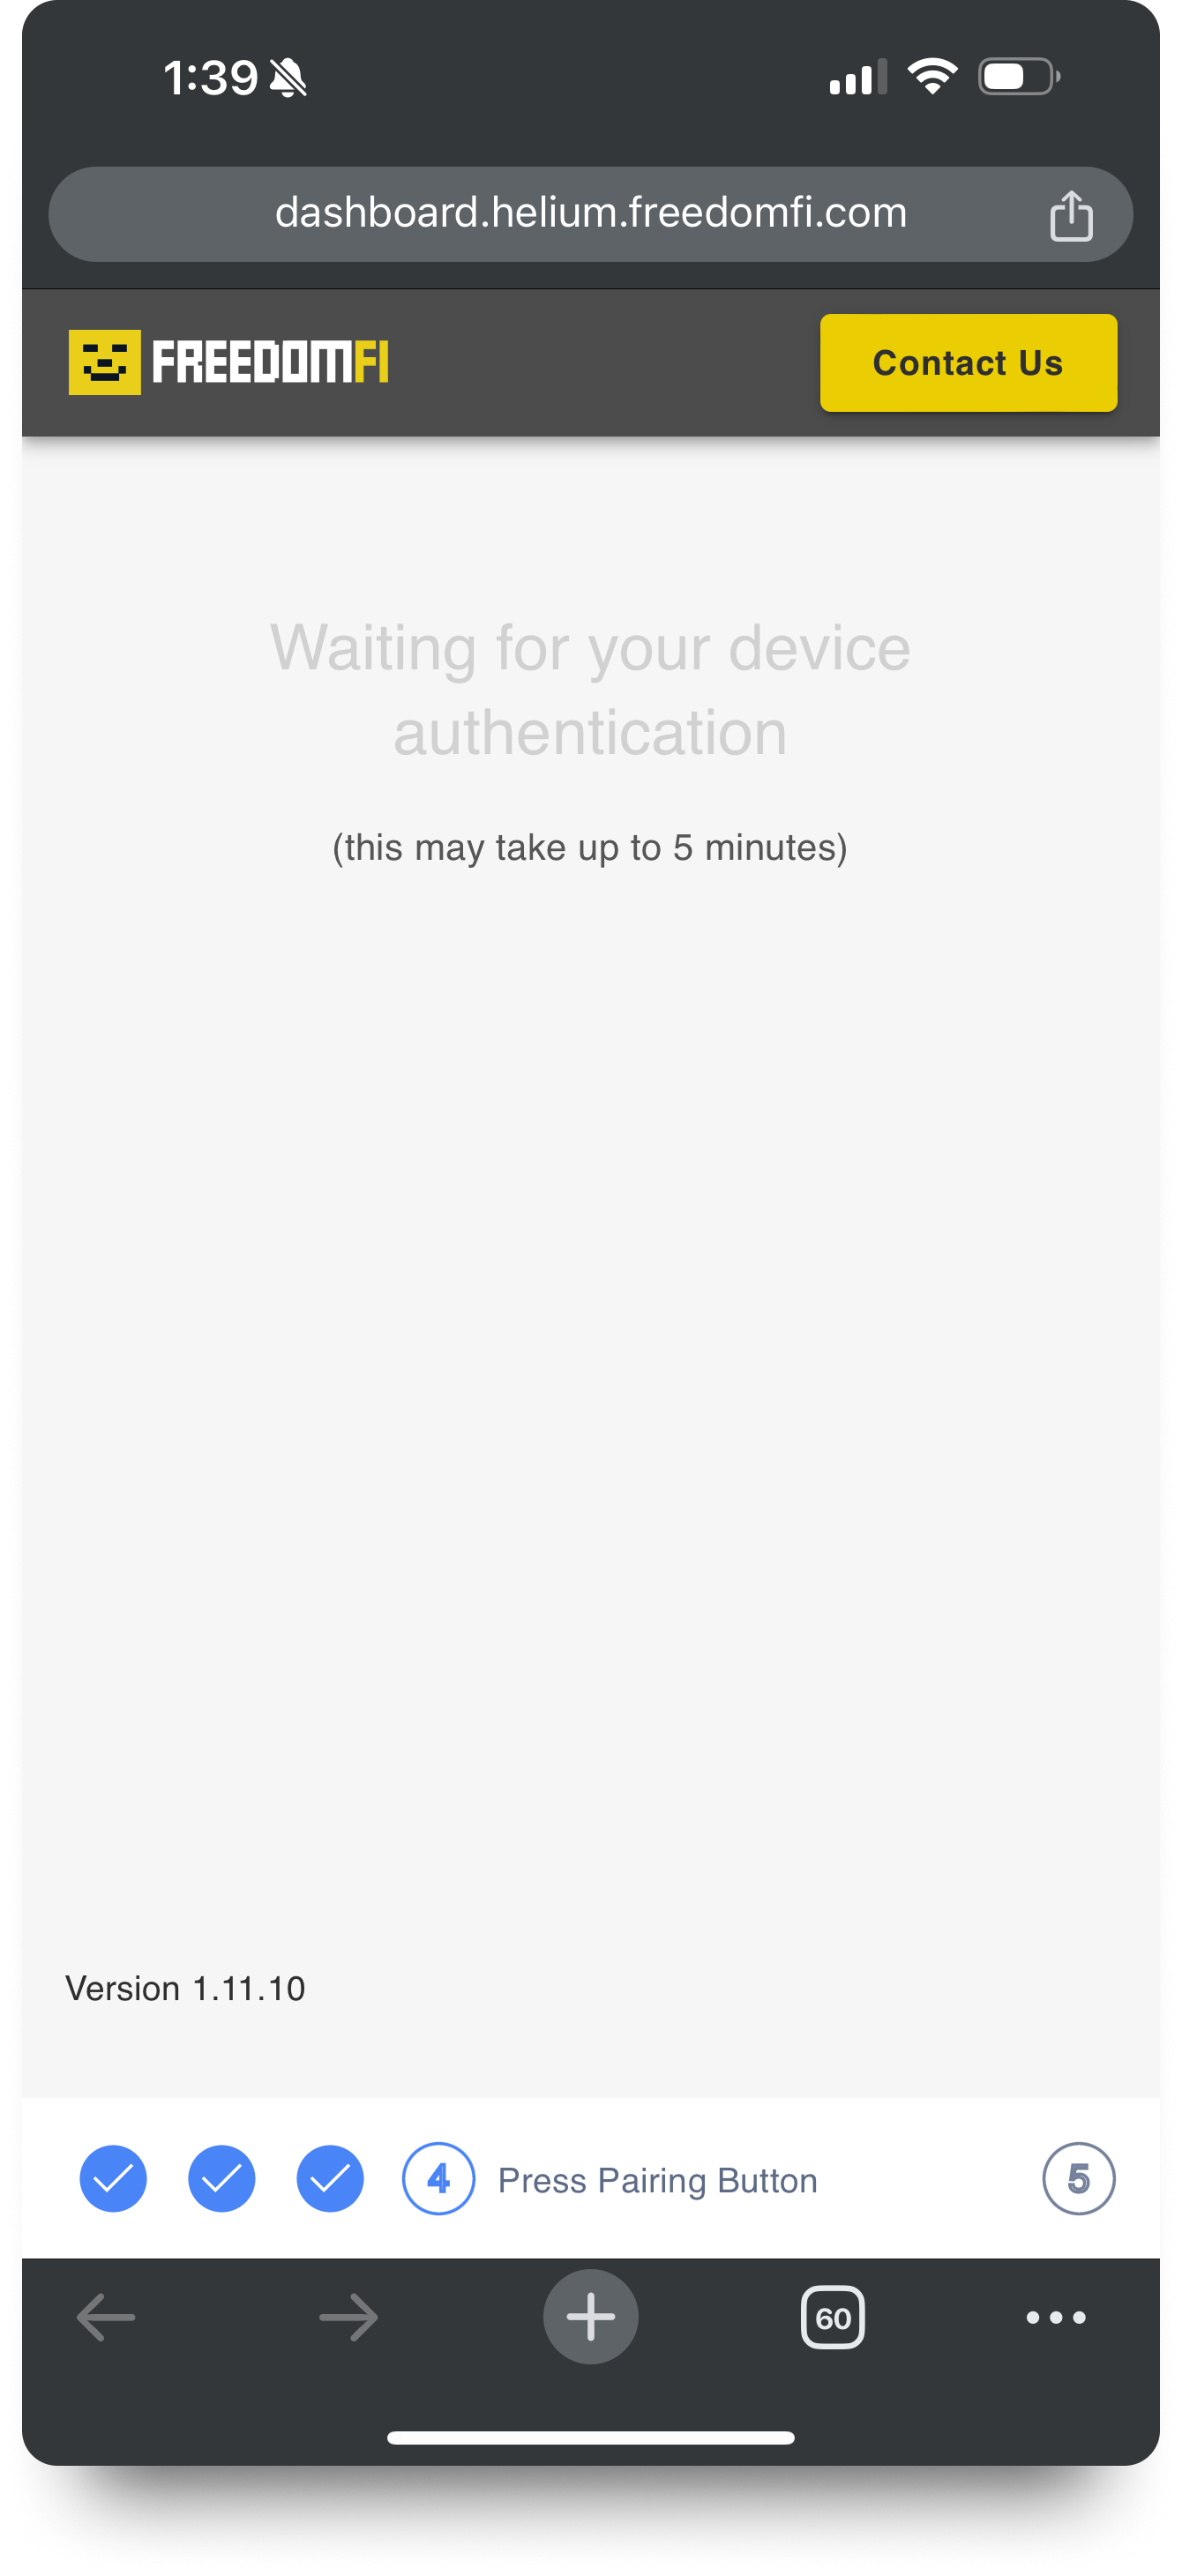
Wait for FreedomFi Gateway authentication
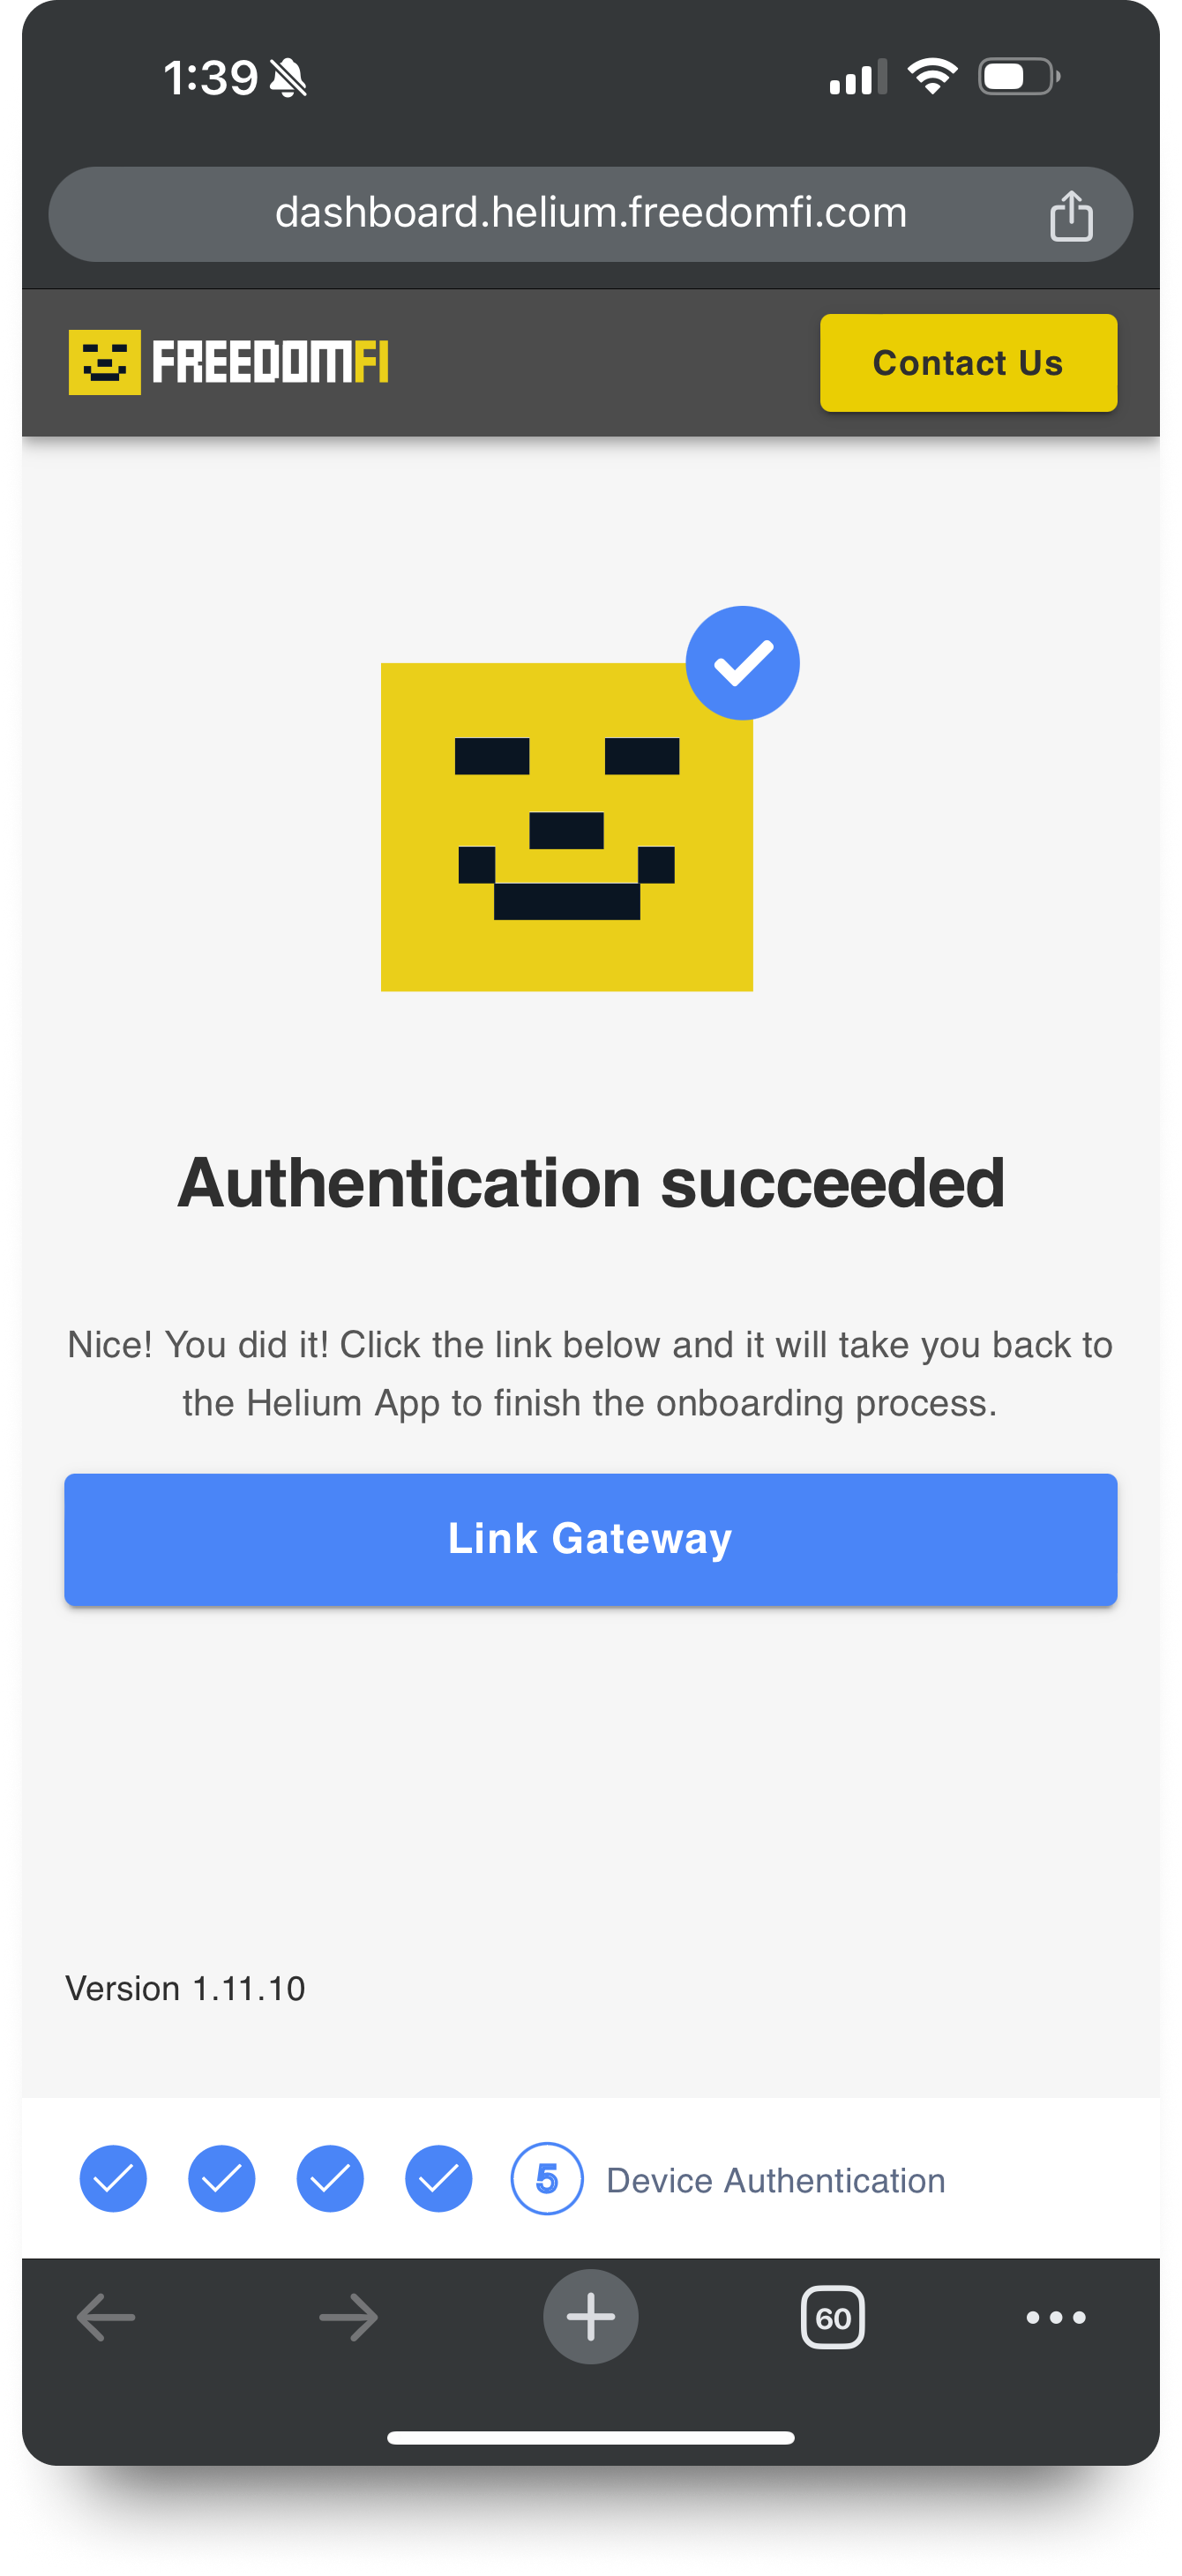
Wait until your Gateway is paired with your Helium Wallet and the “Authentication Successful” message is displayed.
Step 12
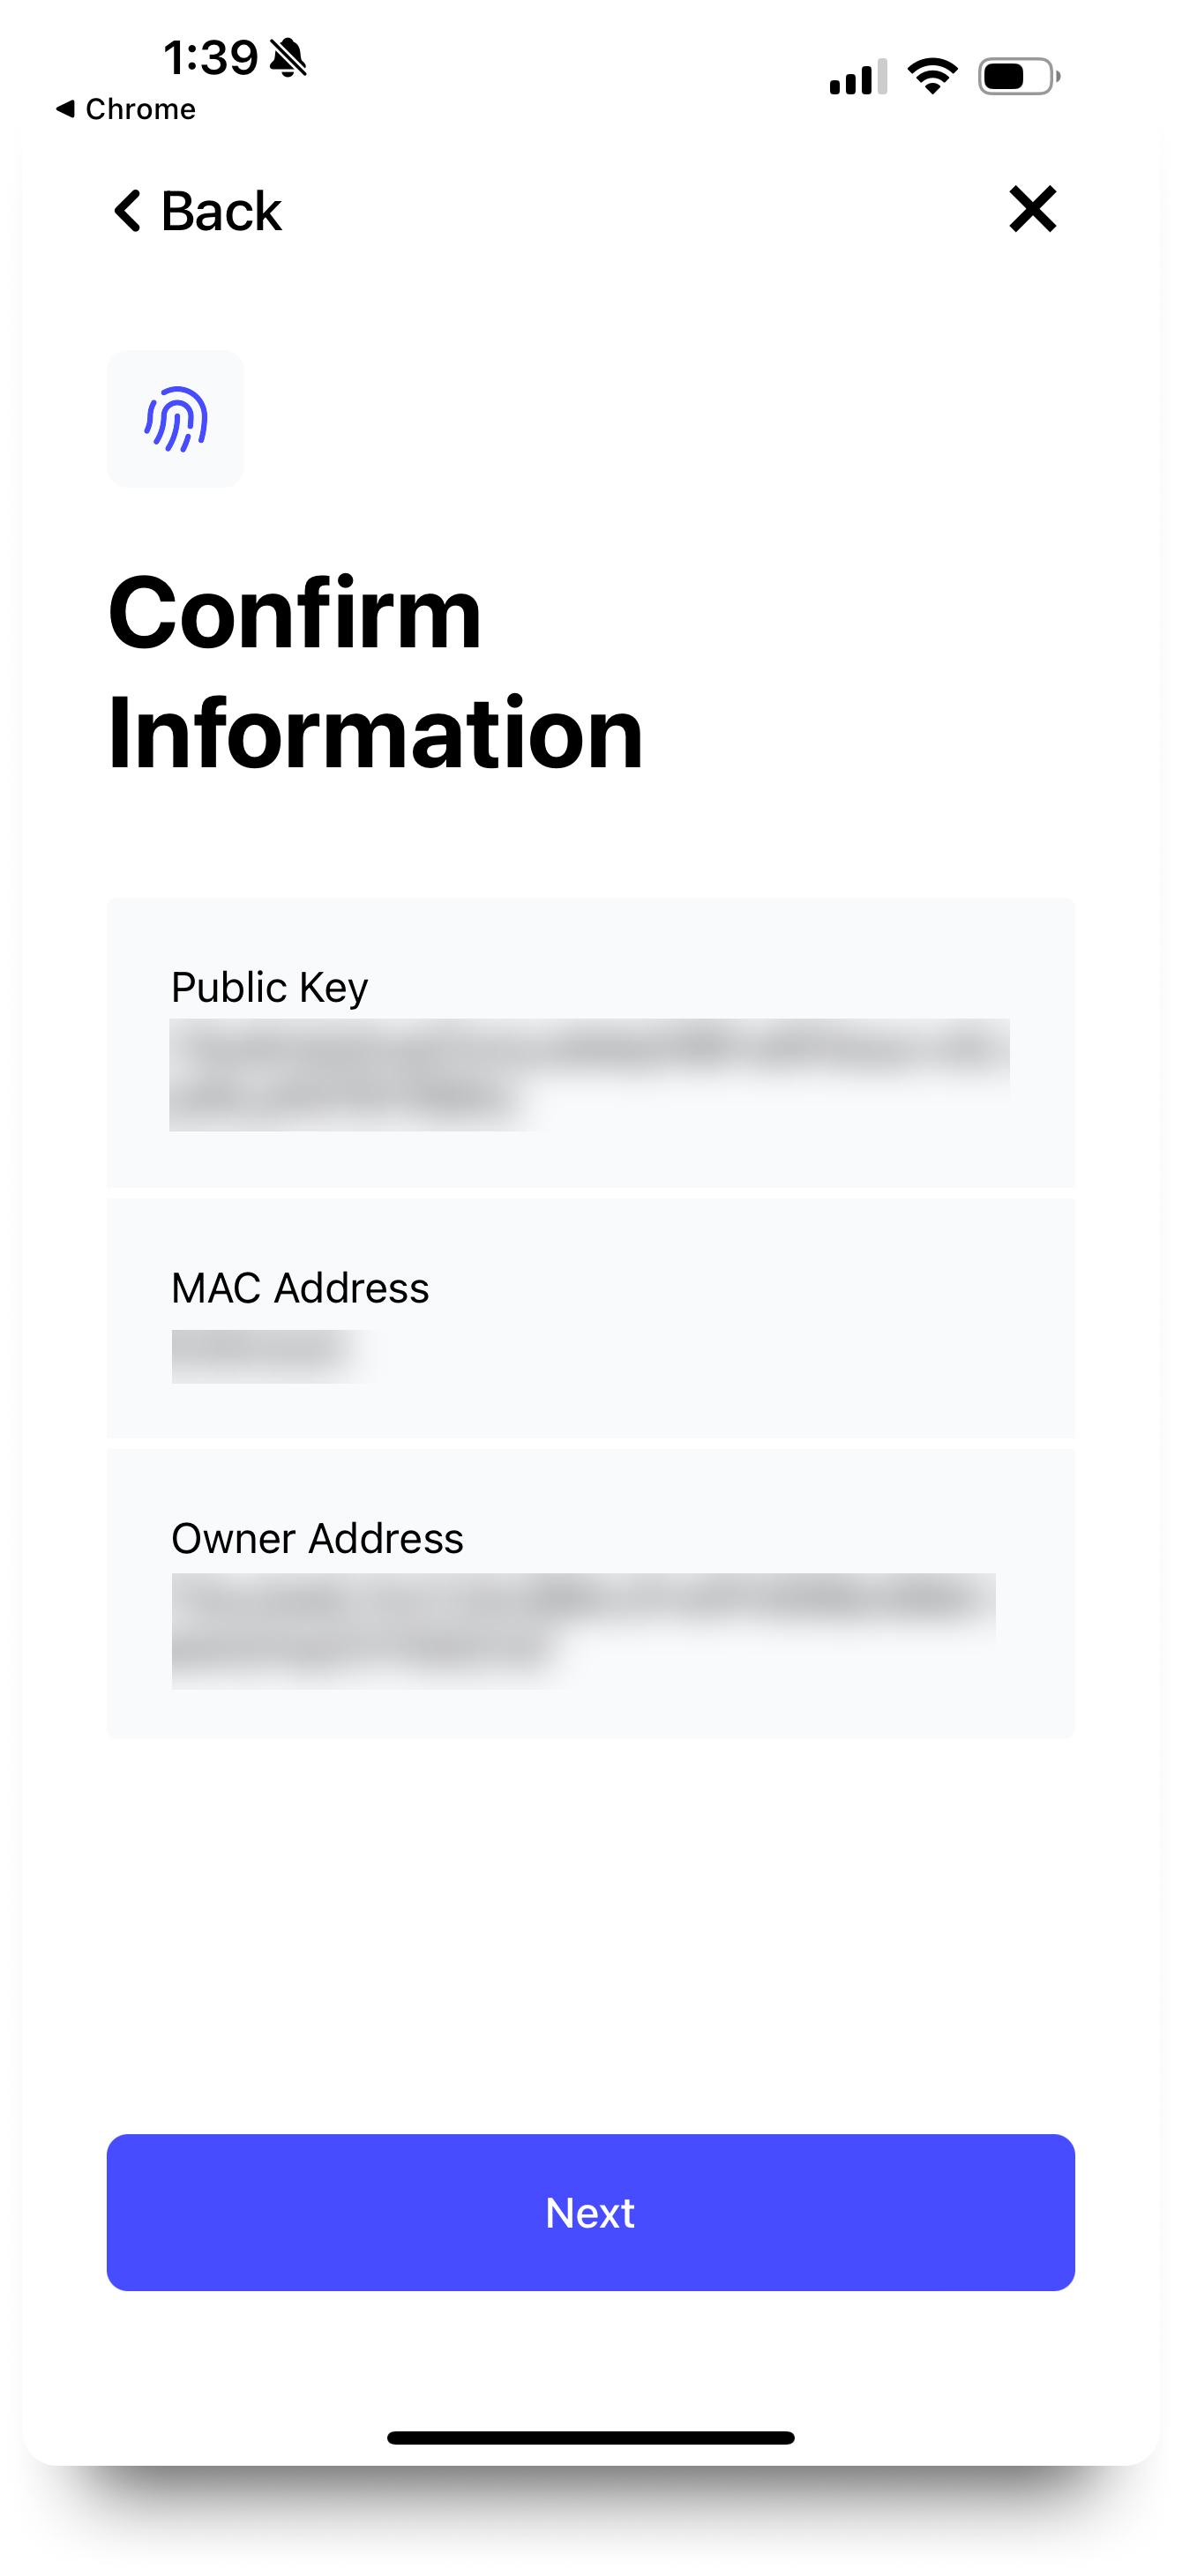
Link your FreedomFi Gateway
Click on “Link Gateway” you will be automatically redirected to the Helium application.
Follow the instructions on screen and confirm your information and click next.
Step 13
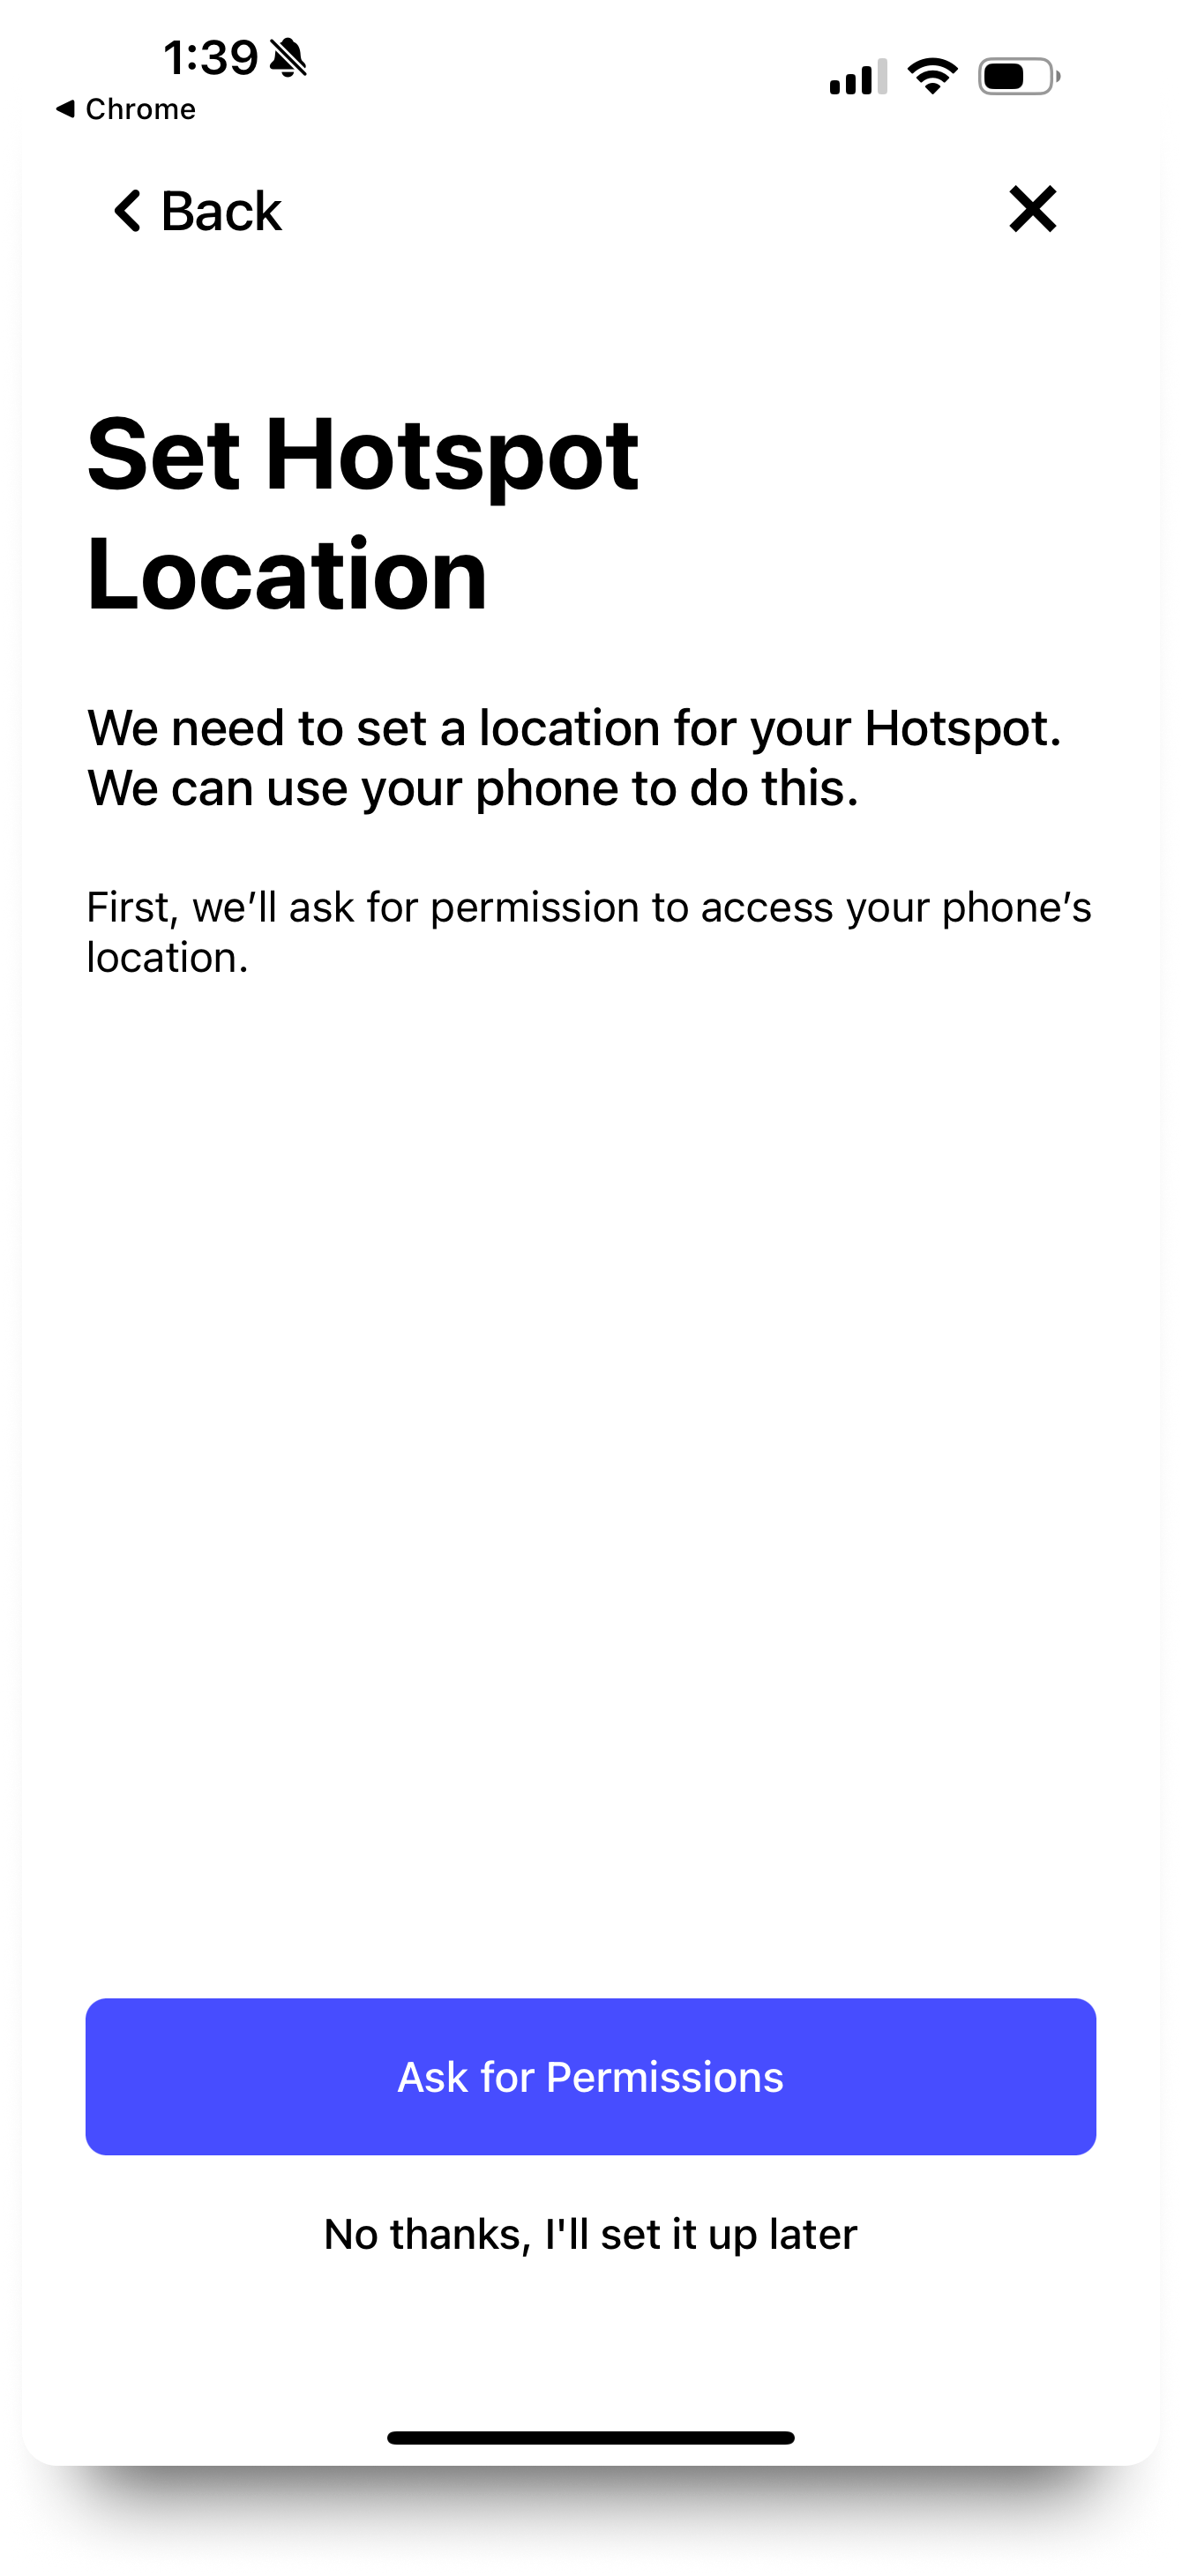
Setting your FreedomFi Gateway location
Now we need to set up your hotspots location, you will need to provide the app with location services permissions, to do this simply click on “Ask for Permissions”.
Then confirm the location, by default it will automatically select your phones location.
Step 14
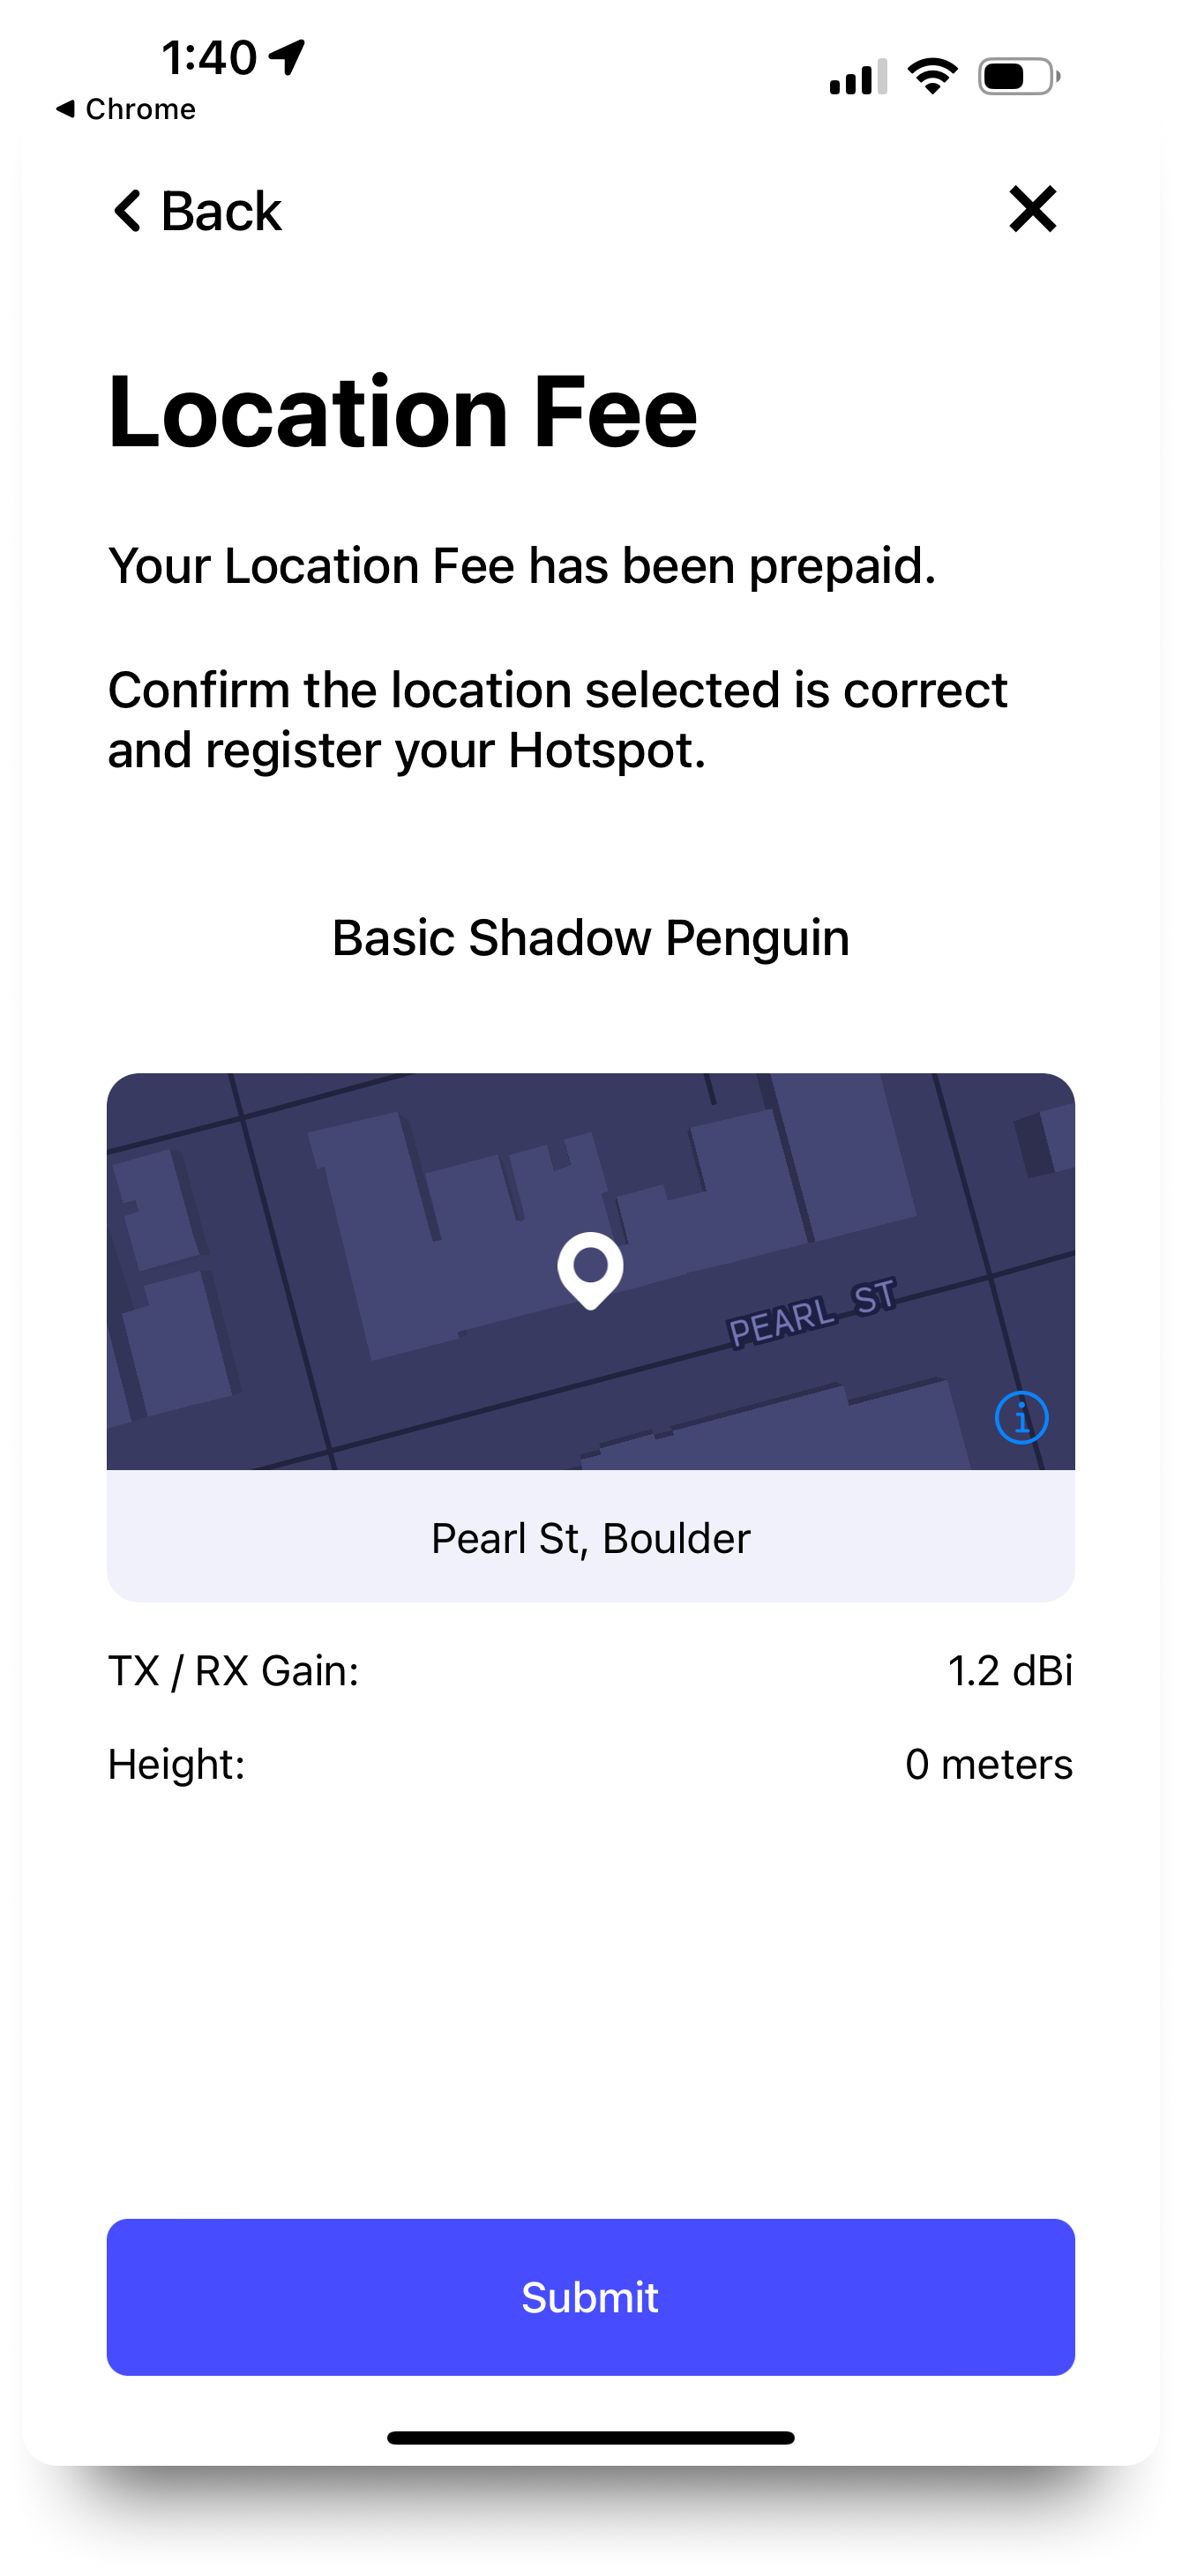
Setting your FreedomFi Gateway antenna & installation information
Next you will need to confirm your Antenna details. If you are using the included antenna your TX/RX Gain should already be correctly configured by default at 1.2 dBi. If you are using an aftermarket antenna, refer to the documentation included with it to find its gain.
Additionally you will need to confirm the installation height of your antenna. This refers to the distance between the ground and your antenna.
Step 15
Confirm your transaction
Lastly, register your transaction, confirm that the Antenna gain, height and location is accurately set. Your initial registration & location fee of $10 has been prepaid, however in the future if you need to make updates, there will be a fee associated with this.
Step 16
Add your Hotspot to the blockchain
Confirm your gateway addition to the blockchain
Step 17
Congratulations, you are done!
The FreedomFi Gateway is now being added to the Helium Network. It may take some time to appear in the Helium app and Helium Explorer as it goes through the Helium registration and synchronization process. Once added, the Gateway can be viewed and managed in your Helium & Helium Wallet apps directly.
This device complies with Part 15 of the FCC Rules. Operation is subject to the following two conditions: (1) this device may not cause harmful interference, and (2) this device must accept any interference received, including interference that may cause undesired operation.
FCC Caution:
–Changes or modifications not expressly approved by the part responsible for compliance could void the user’s authority to operate the equipment.
– FCC RF Radiation Exposure Statement Caution: This Transmitter must be installed to provide a separation distance of at least 20 cm from all persons.
FCC Statement:
“This equipment has been tested and found to comply with the limits for a Class B digital device, pursuant to part 15 of the FCC Rules. These limits are designed to provide reasonable protection against harmful interference in a residential installation. This equipment generates, uses and can radiate radio frequency energy and, if not installed and used in accordance with the instructions, may cause harmful interference to radio communications. However, there is no guarantee that interference will not occur in a particular installation. If this equipment does cause harmful interference to radio or television reception, which can be determined by turning the equipment off and on, the user is encouraged to try to correct the interference by one or more of the following measures:
– Reorient or relocate the receiving antenna.
– Increase the separation between the equipment and receiver.
– Connect the equipment into an outlet on a circuit different from that to which the receiver is connected.
– Consult the dealer or an experienced radio/TV technician for help.”
IC statement:
This device complies with Industry Canada licence-exempt RSS standard(s).
Operation is subject to the following two conditions: (1) this device may not cause interference, and (2) this device must accept any interference, including interference that may cause undesired operation of the device.
Le présent appareil est conforme aux CNR d’Industrie Canada applicables aux appareils radio exempts de licence. L’exploitation est autorisée aux deux conditions suivantes : (1) l’appareil ne doit pas produire de brouillage, et (2) l’utilisateur de l’appareil doit accepter tout brouillage radioélectrique subi, même si le brouillage est susceptible d’en compromettre le fonctionnement.
Cet émetteur doit être installé pour fournir une distance de séparation d’au moins 20 cm de toute personne.
Manage consent
Privacy Overview
This website uses cookies to improve your experience while you navigate through the website. Out of these, the cookies that are categorized as necessary are stored on your browser as they are essential for the working of basic functionalities of the website. We also use third-party cookies that help us analyze and understand how you use this website. These cookies will be stored in your browser only with your consent. You also have the option to opt-out of these cookies. But opting out of some of these cookies may affect your browsing experience.
Necessary cookies are absolutely essential for the website to function properly. These cookies ensure basic functionalities and security features of the website, anonymously.
Cookie
Duration
Description
cookielawinfo-checkbox-analytics
11 months
This cookie is set by GDPR Cookie Consent plugin. The cookie is used to store the user consent for the cookies in the category "Analytics".
cookielawinfo-checkbox-functional
11 months
The cookie is set by GDPR cookie consent to record the user consent for the cookies in the category "Functional".
cookielawinfo-checkbox-necessary
11 months
This cookie is set by GDPR Cookie Consent plugin. The cookies is used to store the user consent for the cookies in the category "Necessary".
cookielawinfo-checkbox-others
11 months
This cookie is set by GDPR Cookie Consent plugin. The cookie is used to store the user consent for the cookies in the category "Other.
cookielawinfo-checkbox-performance
11 months
This cookie is set by GDPR Cookie Consent plugin. The cookie is used to store the user consent for the cookies in the category "Performance".
viewed_cookie_policy
11 months
The cookie is set by the GDPR Cookie Consent plugin and is used to store whether or not user has consented to the use of cookies. It does not store any personal data.
Functional cookies help to perform certain functionalities like sharing the content of the website on social media platforms, collect feedbacks, and other third-party features.
Performance cookies are used to understand and analyze the key performance indexes of the website which helps in delivering a better user experience for the visitors.
Analytical cookies are used to understand how visitors interact with the website. These cookies help provide information on metrics the number of visitors, bounce rate, traffic source, etc.
Advertisement cookies are used to provide visitors with relevant ads and marketing campaigns. These cookies track visitors across websites and collect information to provide customized ads.