FreedomFi Baicells Nova430H Outdoor CBRS Small Cell

Plug-and-Play Setup Guide

Prerequisites: This guide assumes that your FreedomFi gateway is already set up and is running. FreedomFi gateway software is updated to 1.9.0 or later.

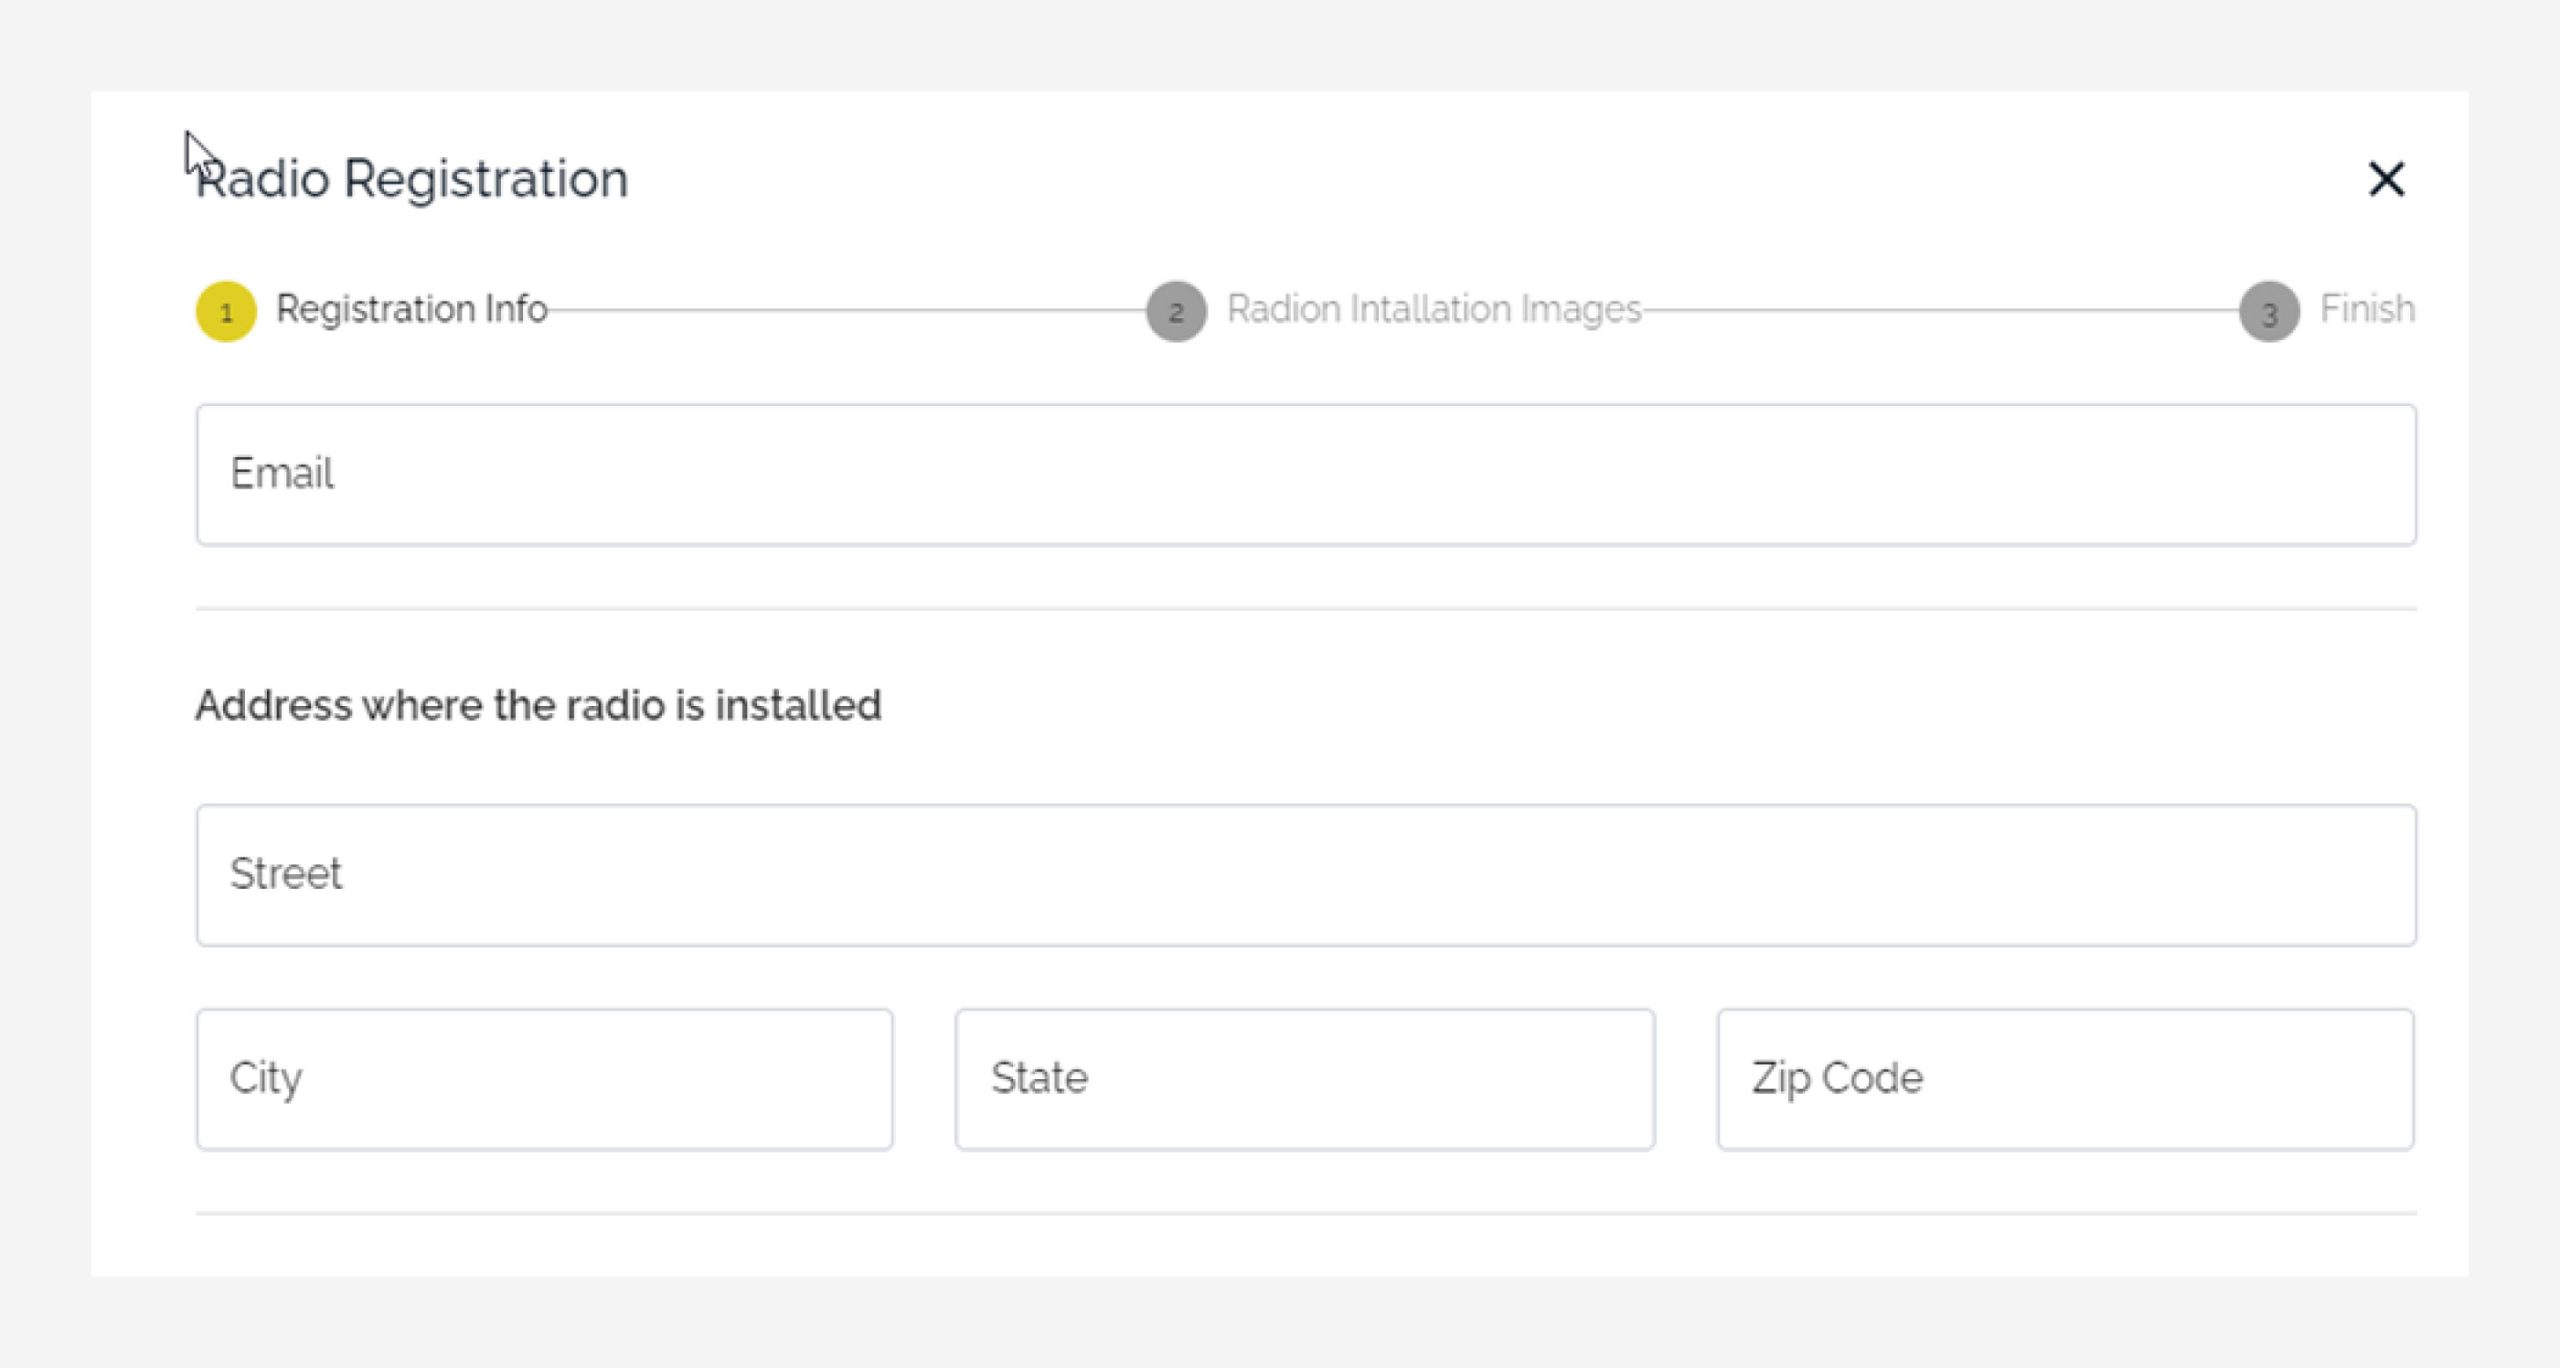
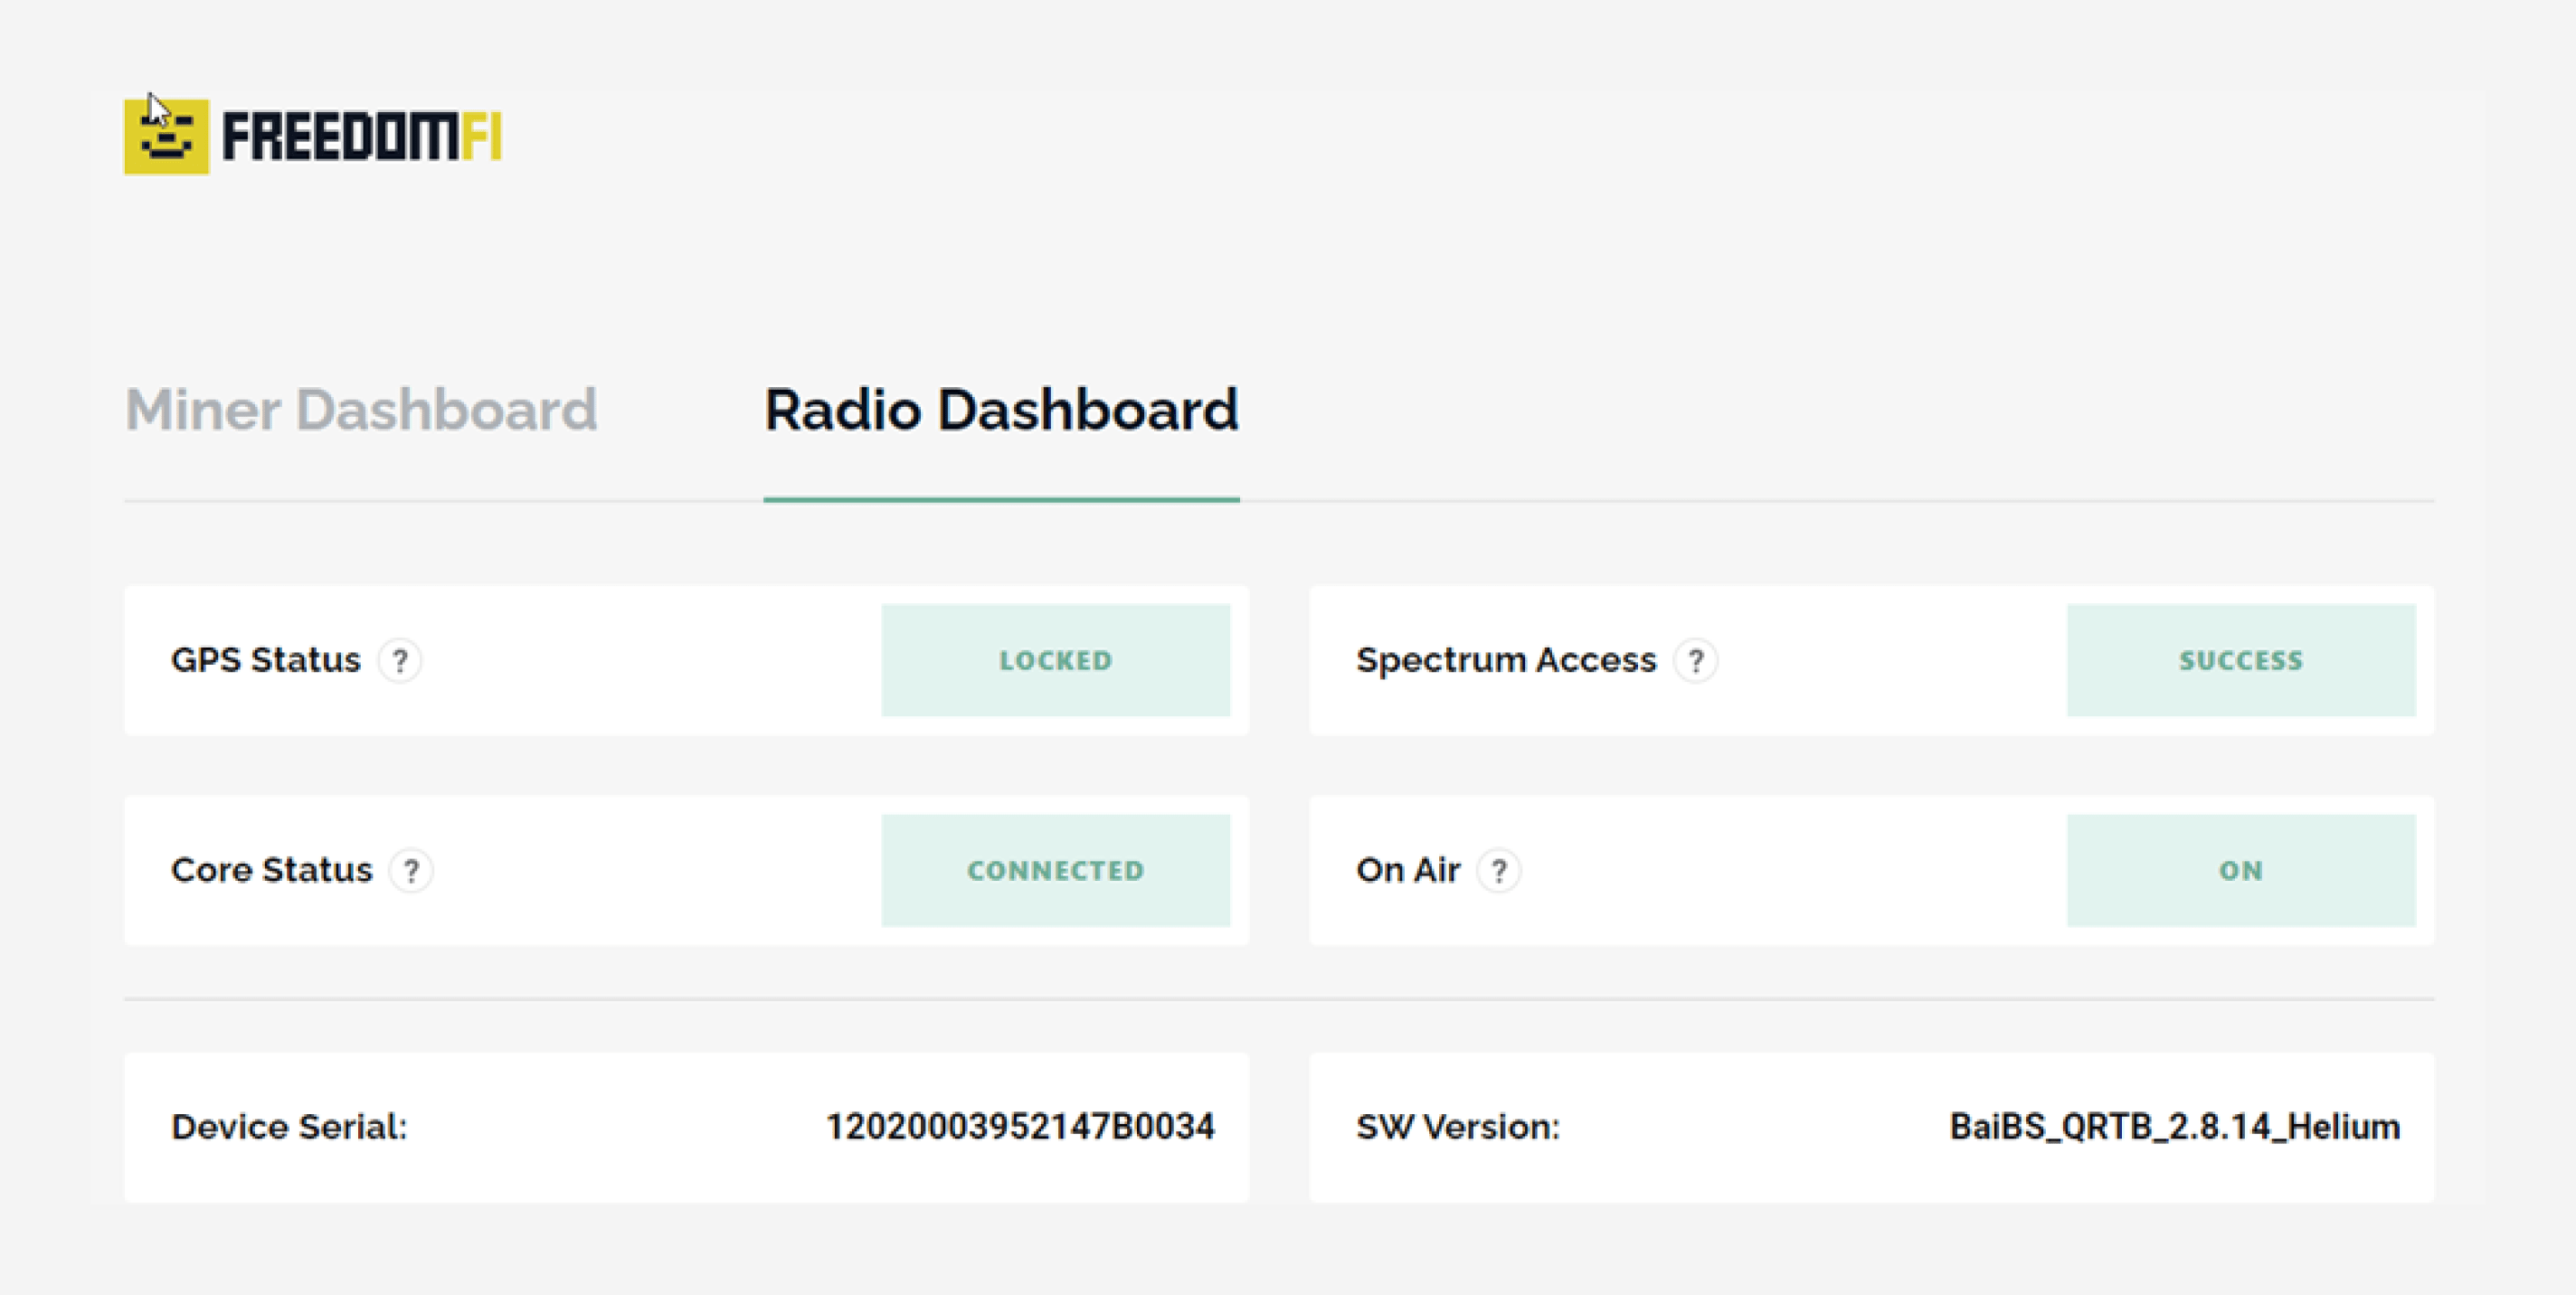
Initial Connectivity Setup
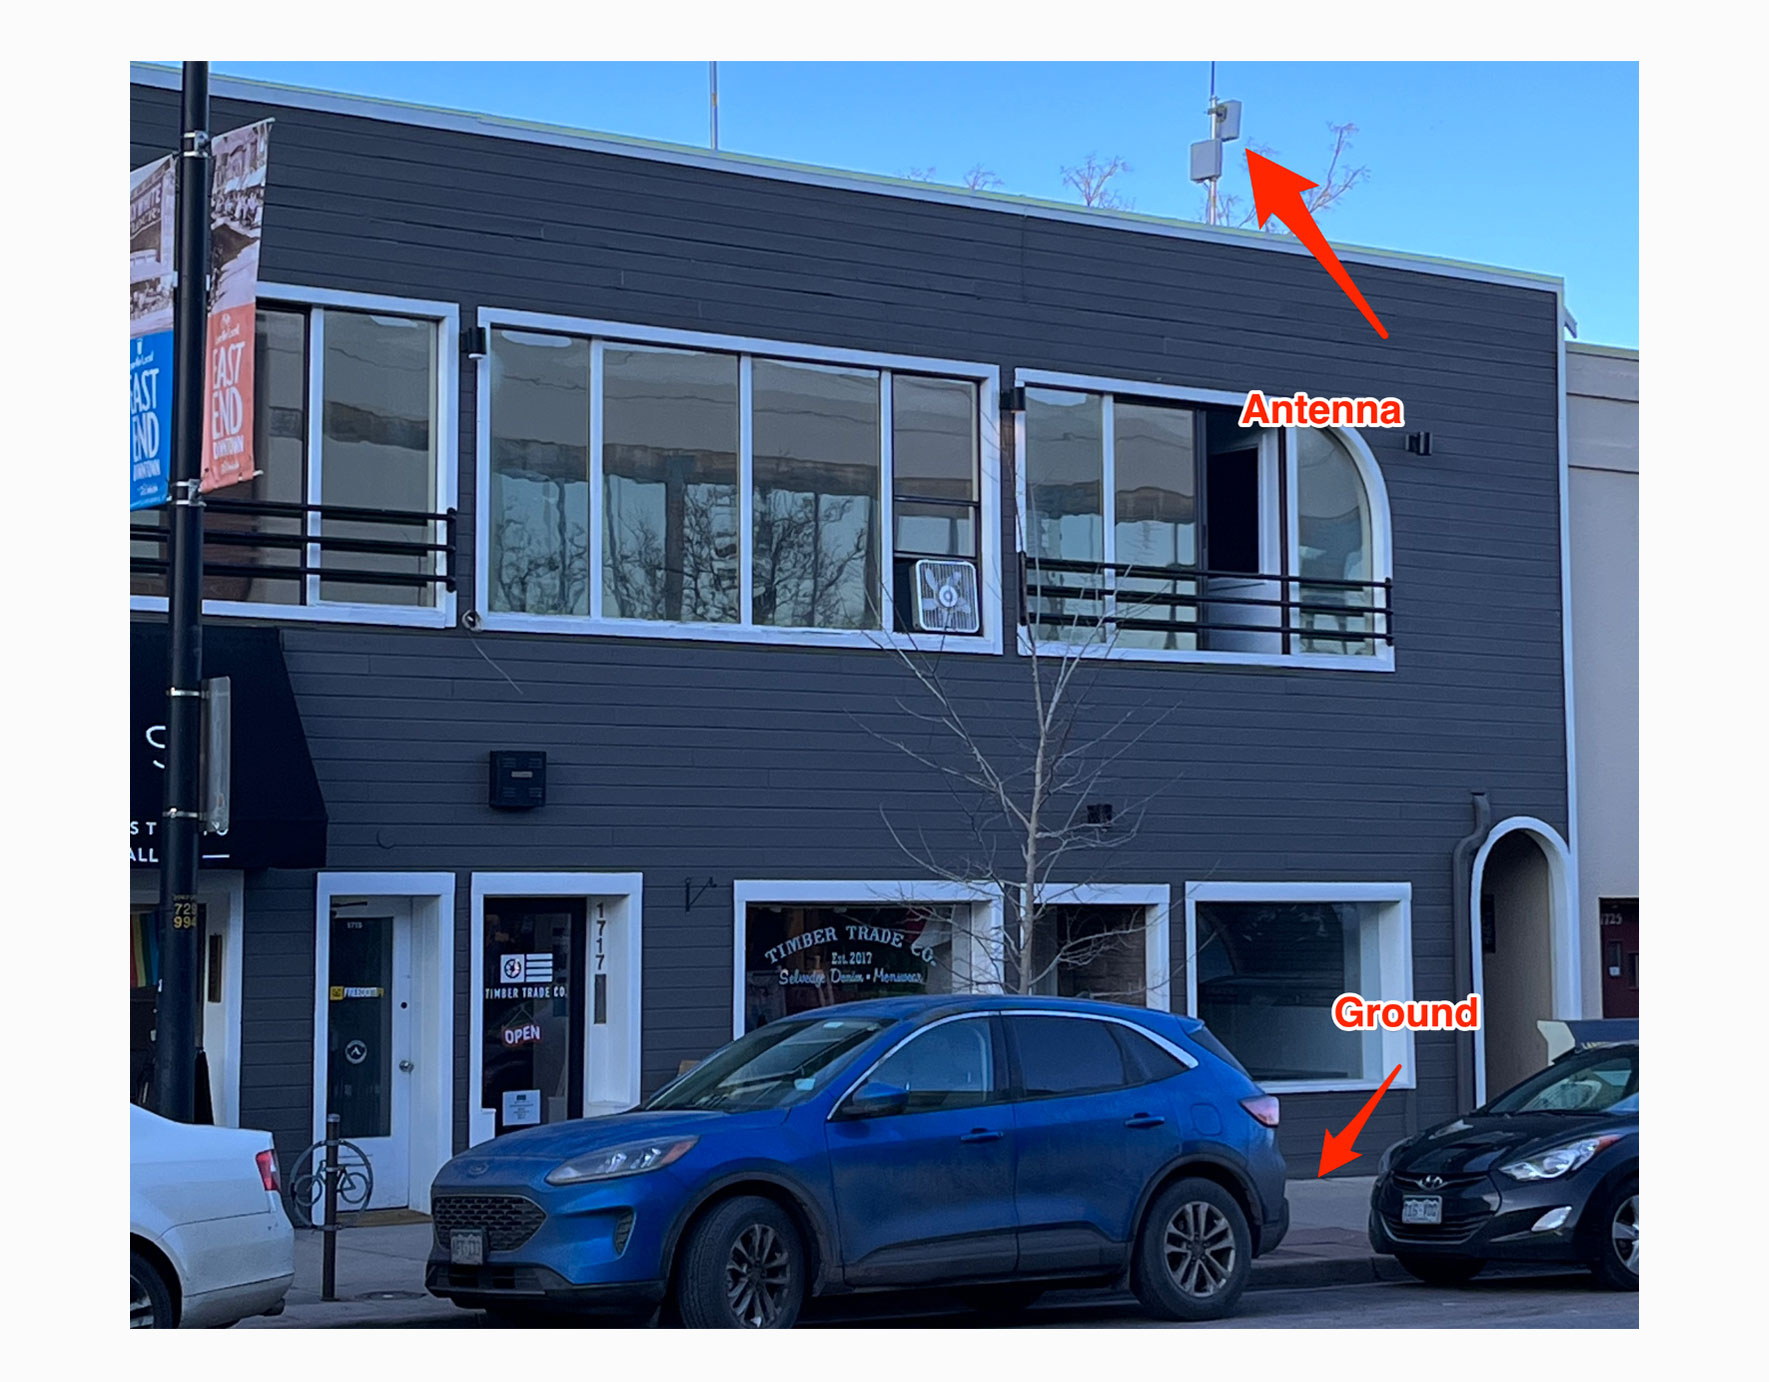
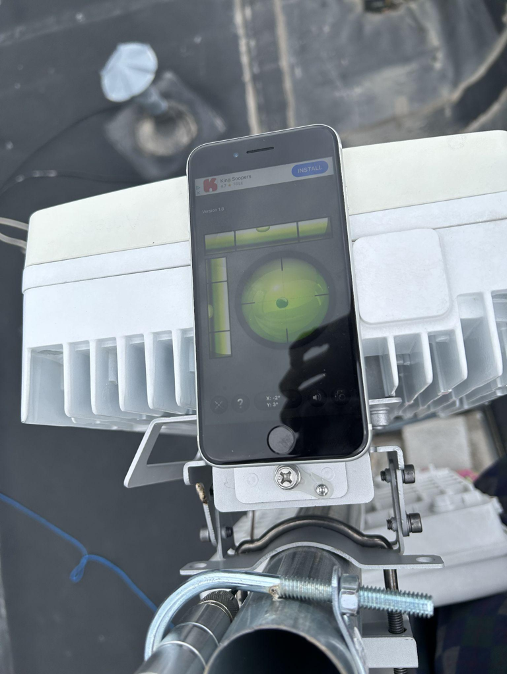
To start, we will be placing the Outdoor small cell inside near a window and next to your network gear to confirm a set of preliminary checks. This validates that things are working before the outdoor small cell is deployed to its permanent location where it may be difficult to access. Before setting up your Outdoor Small Cell, first setup your FreedomFi or Powered by FreedomFi gateway (like the Bobcat Bobber 500) by following the steps in the FreedomFi Gateway Setup Guide
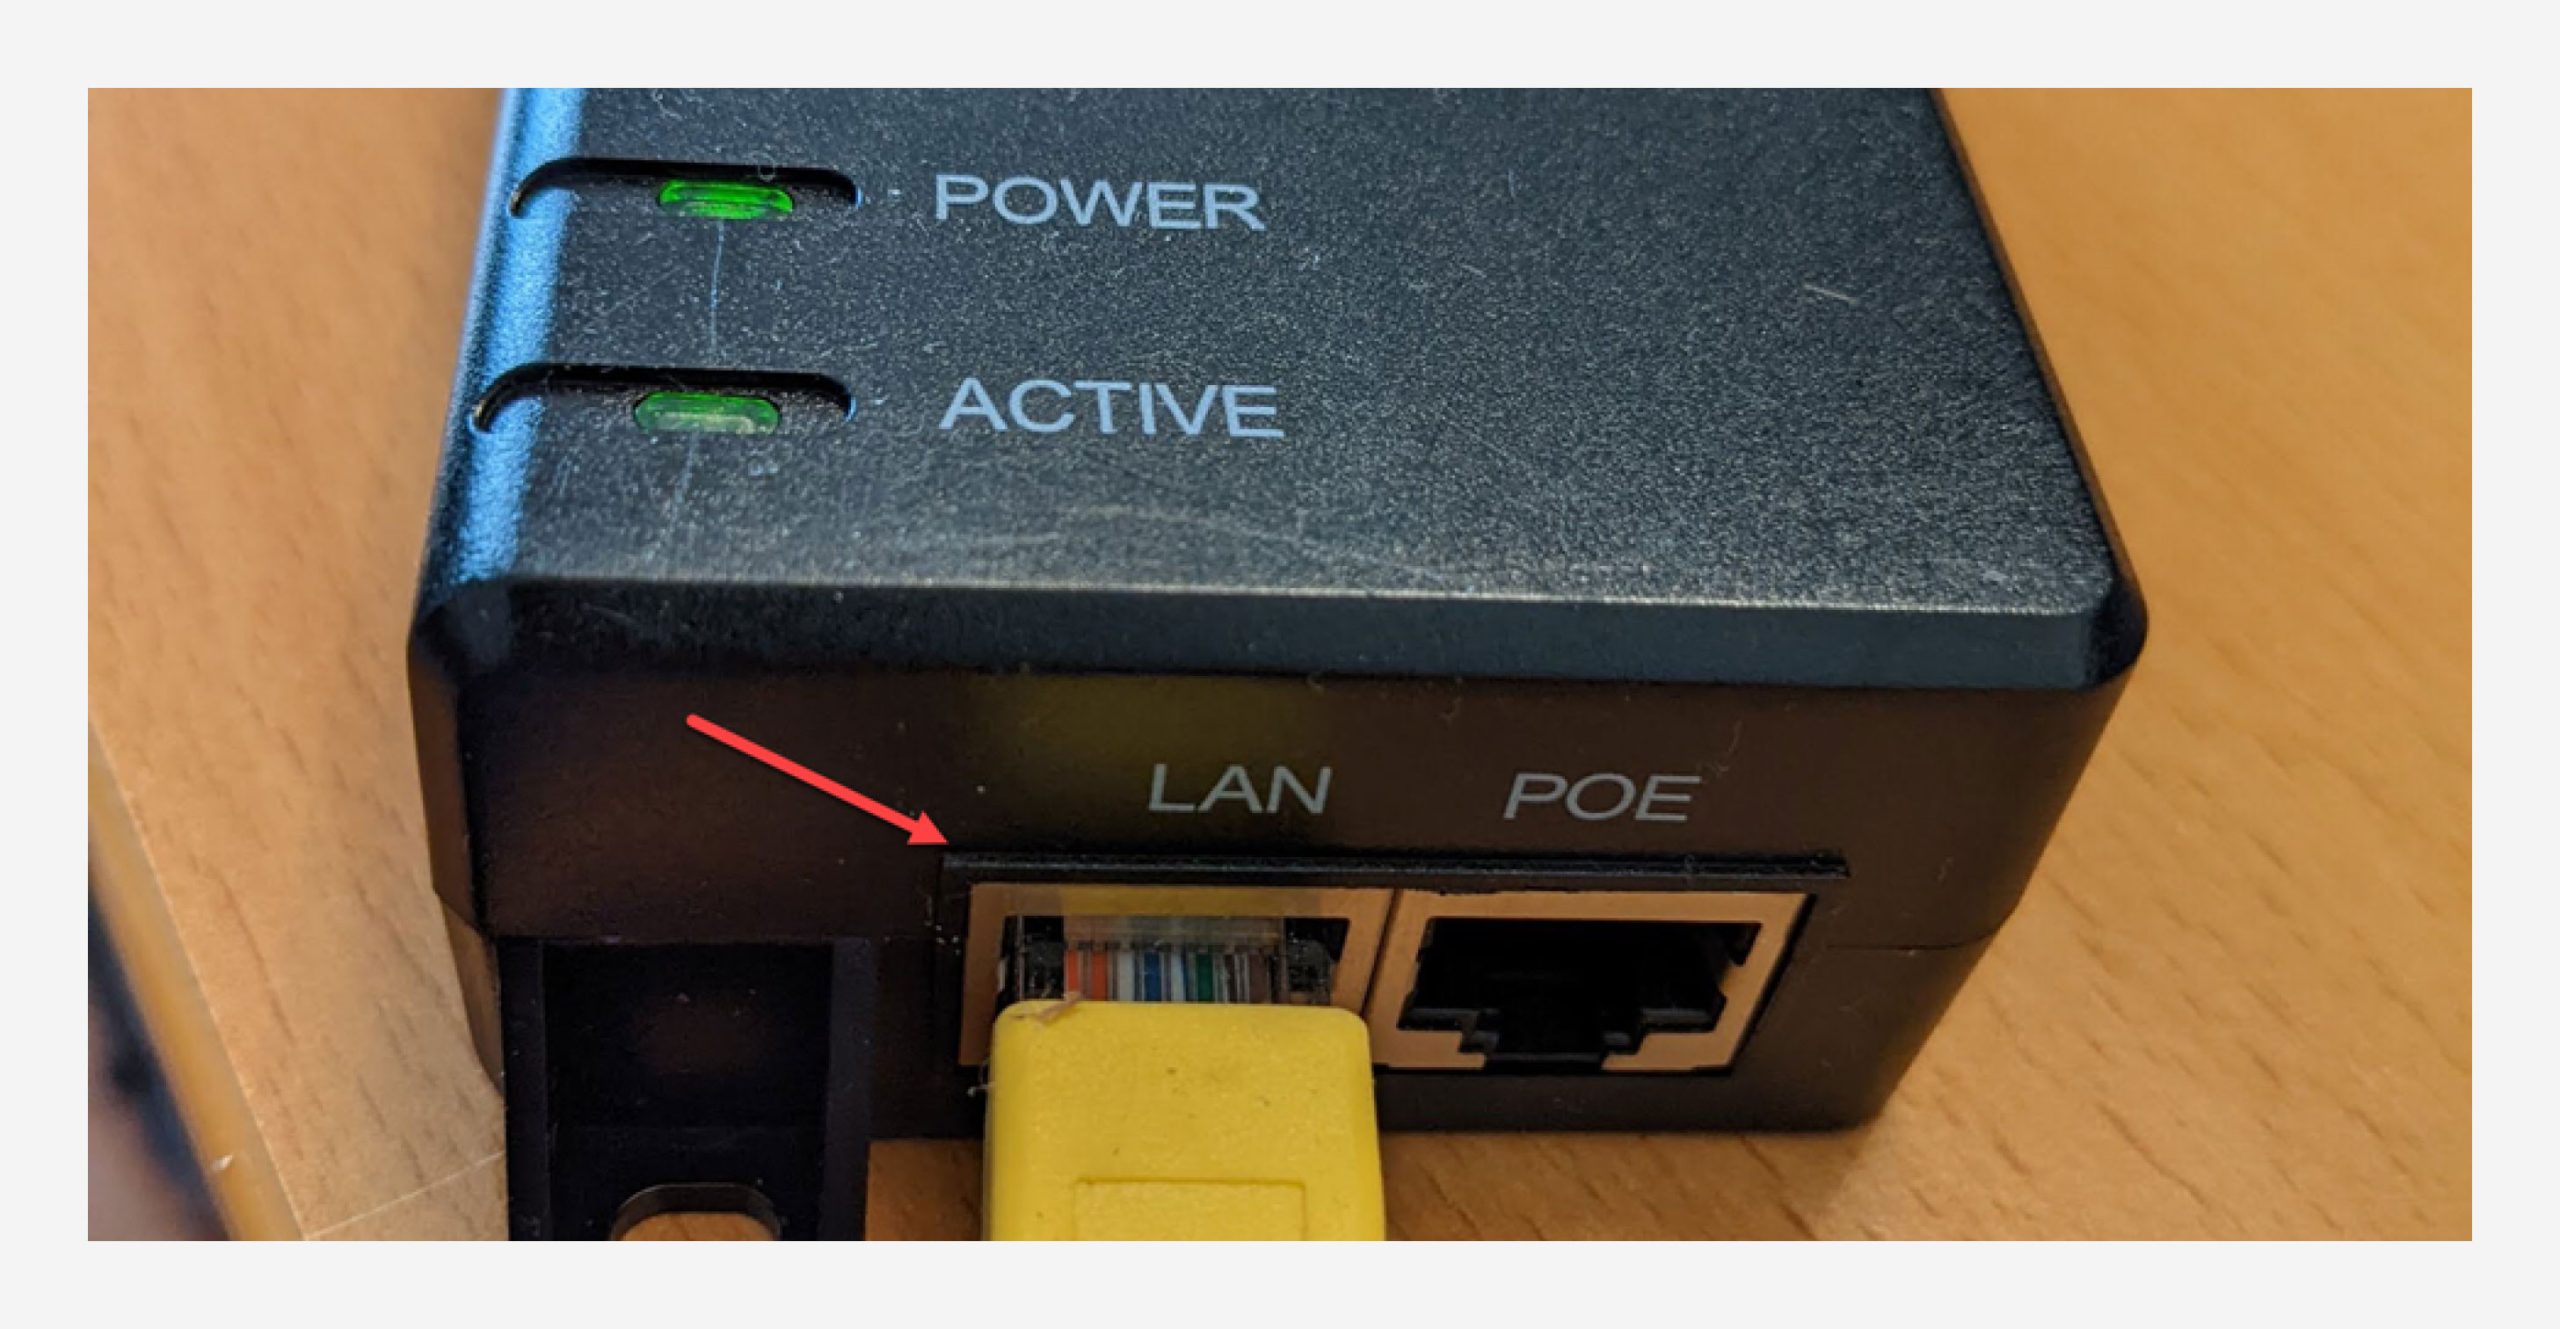
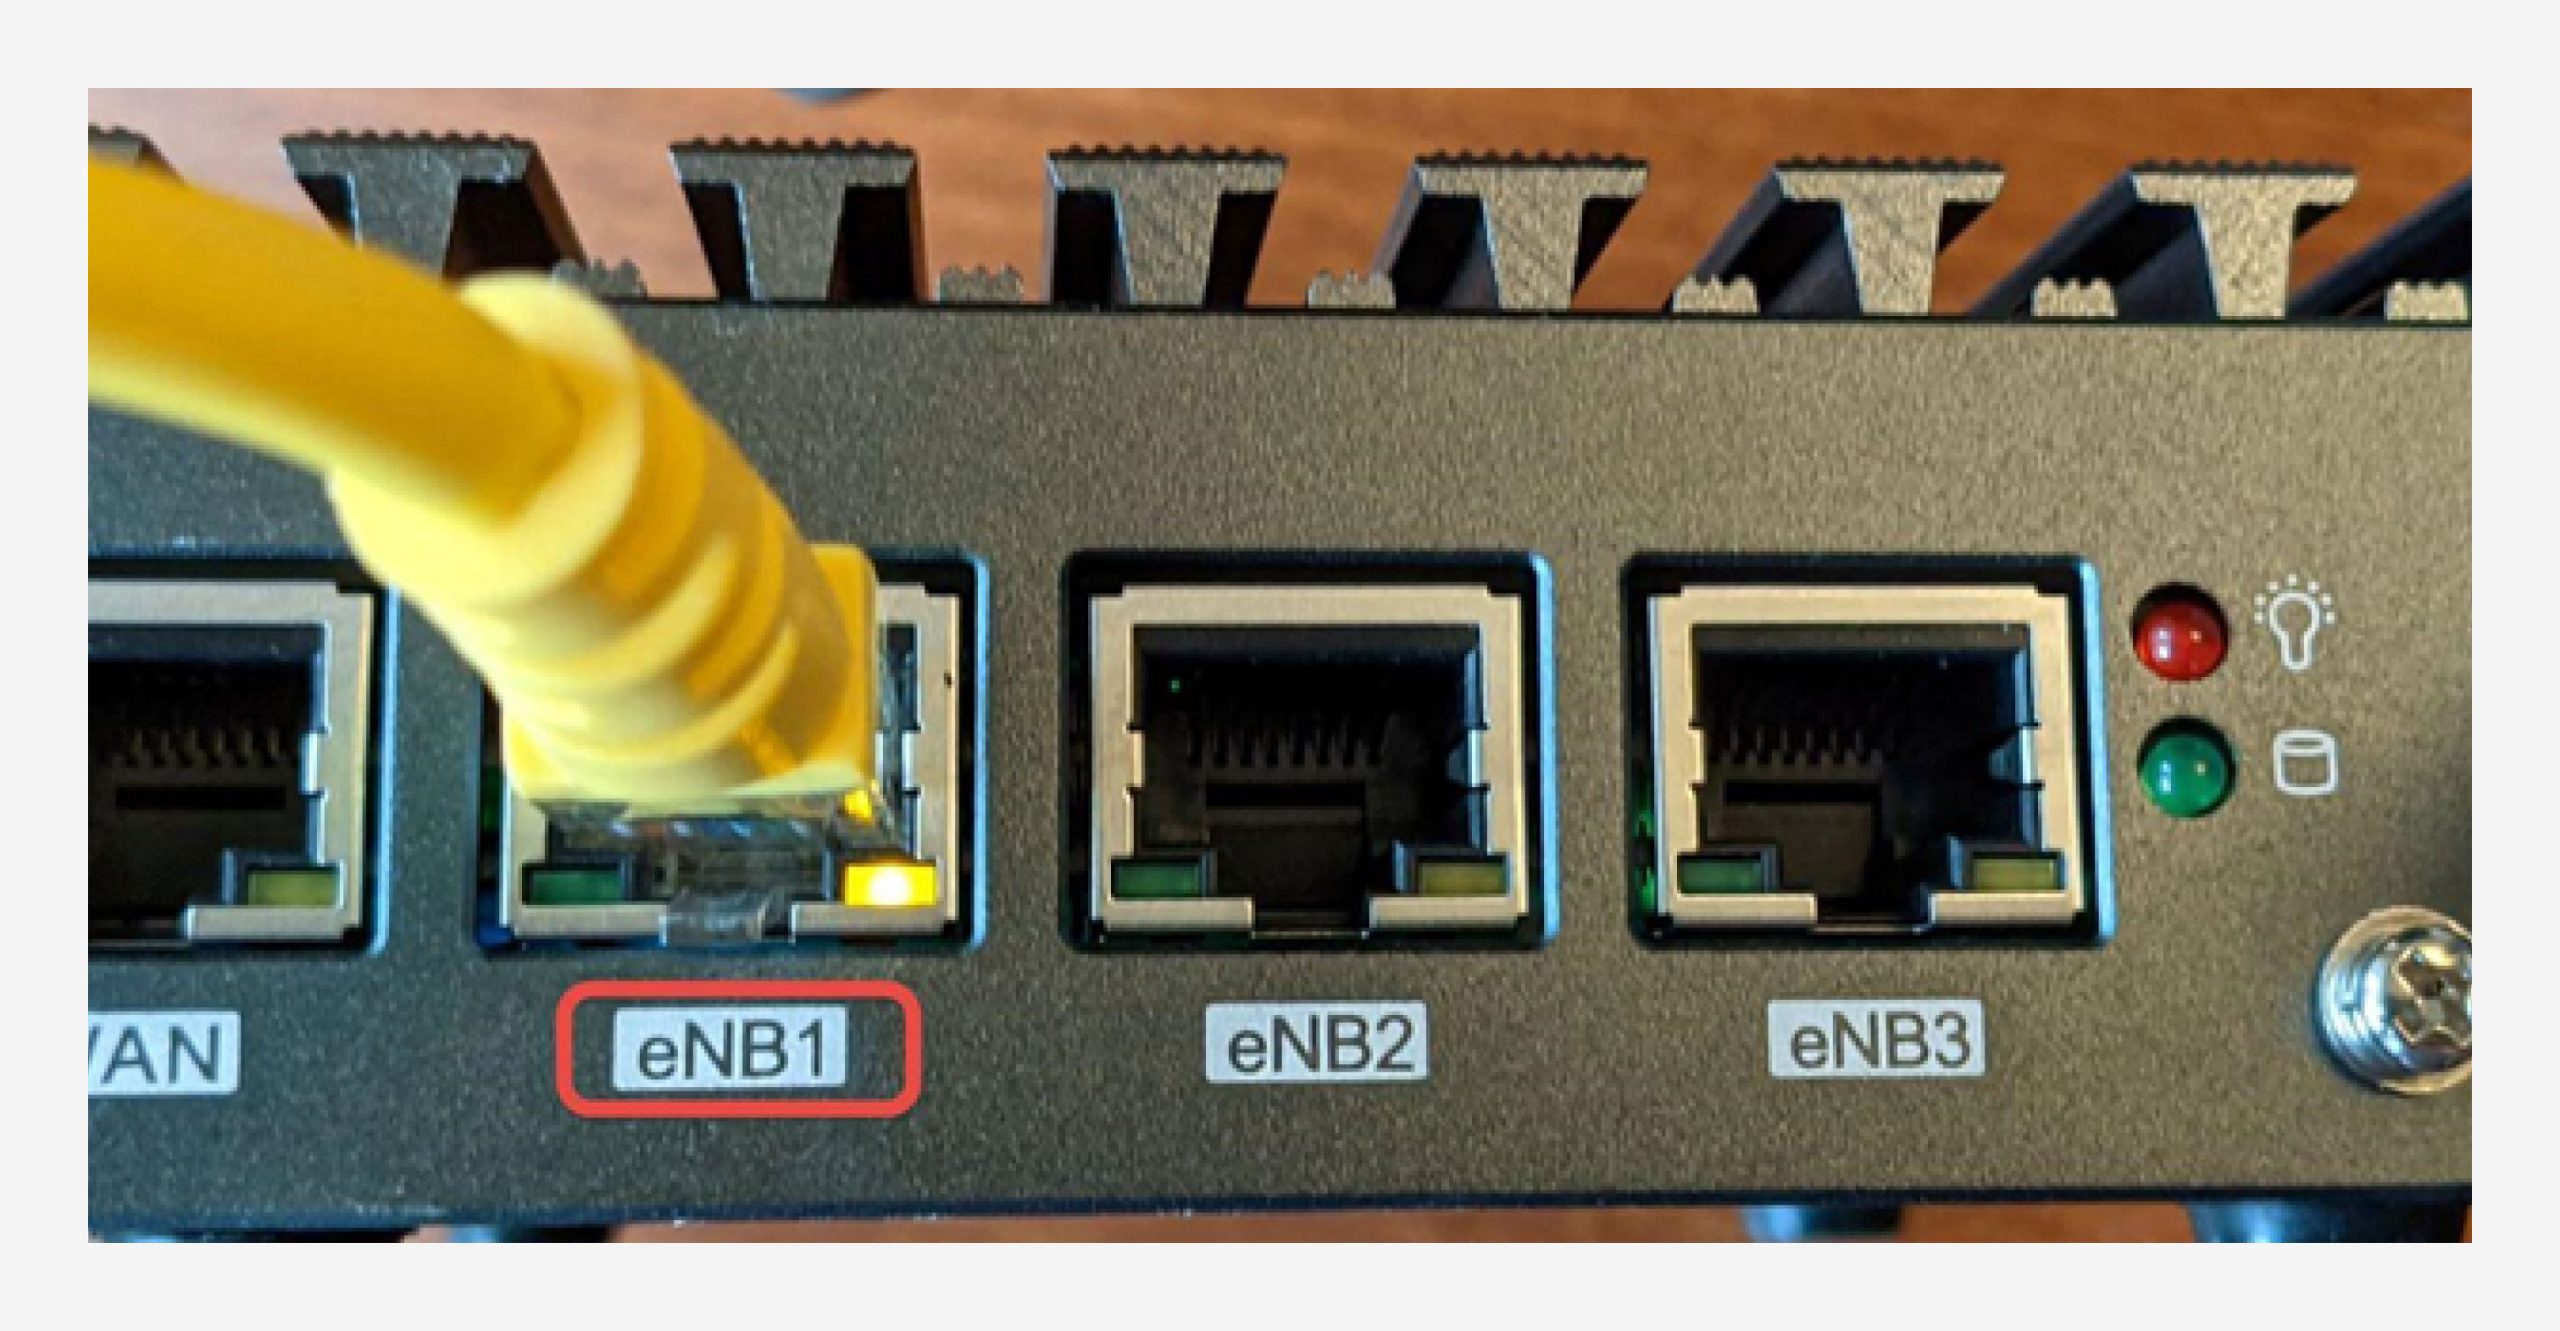
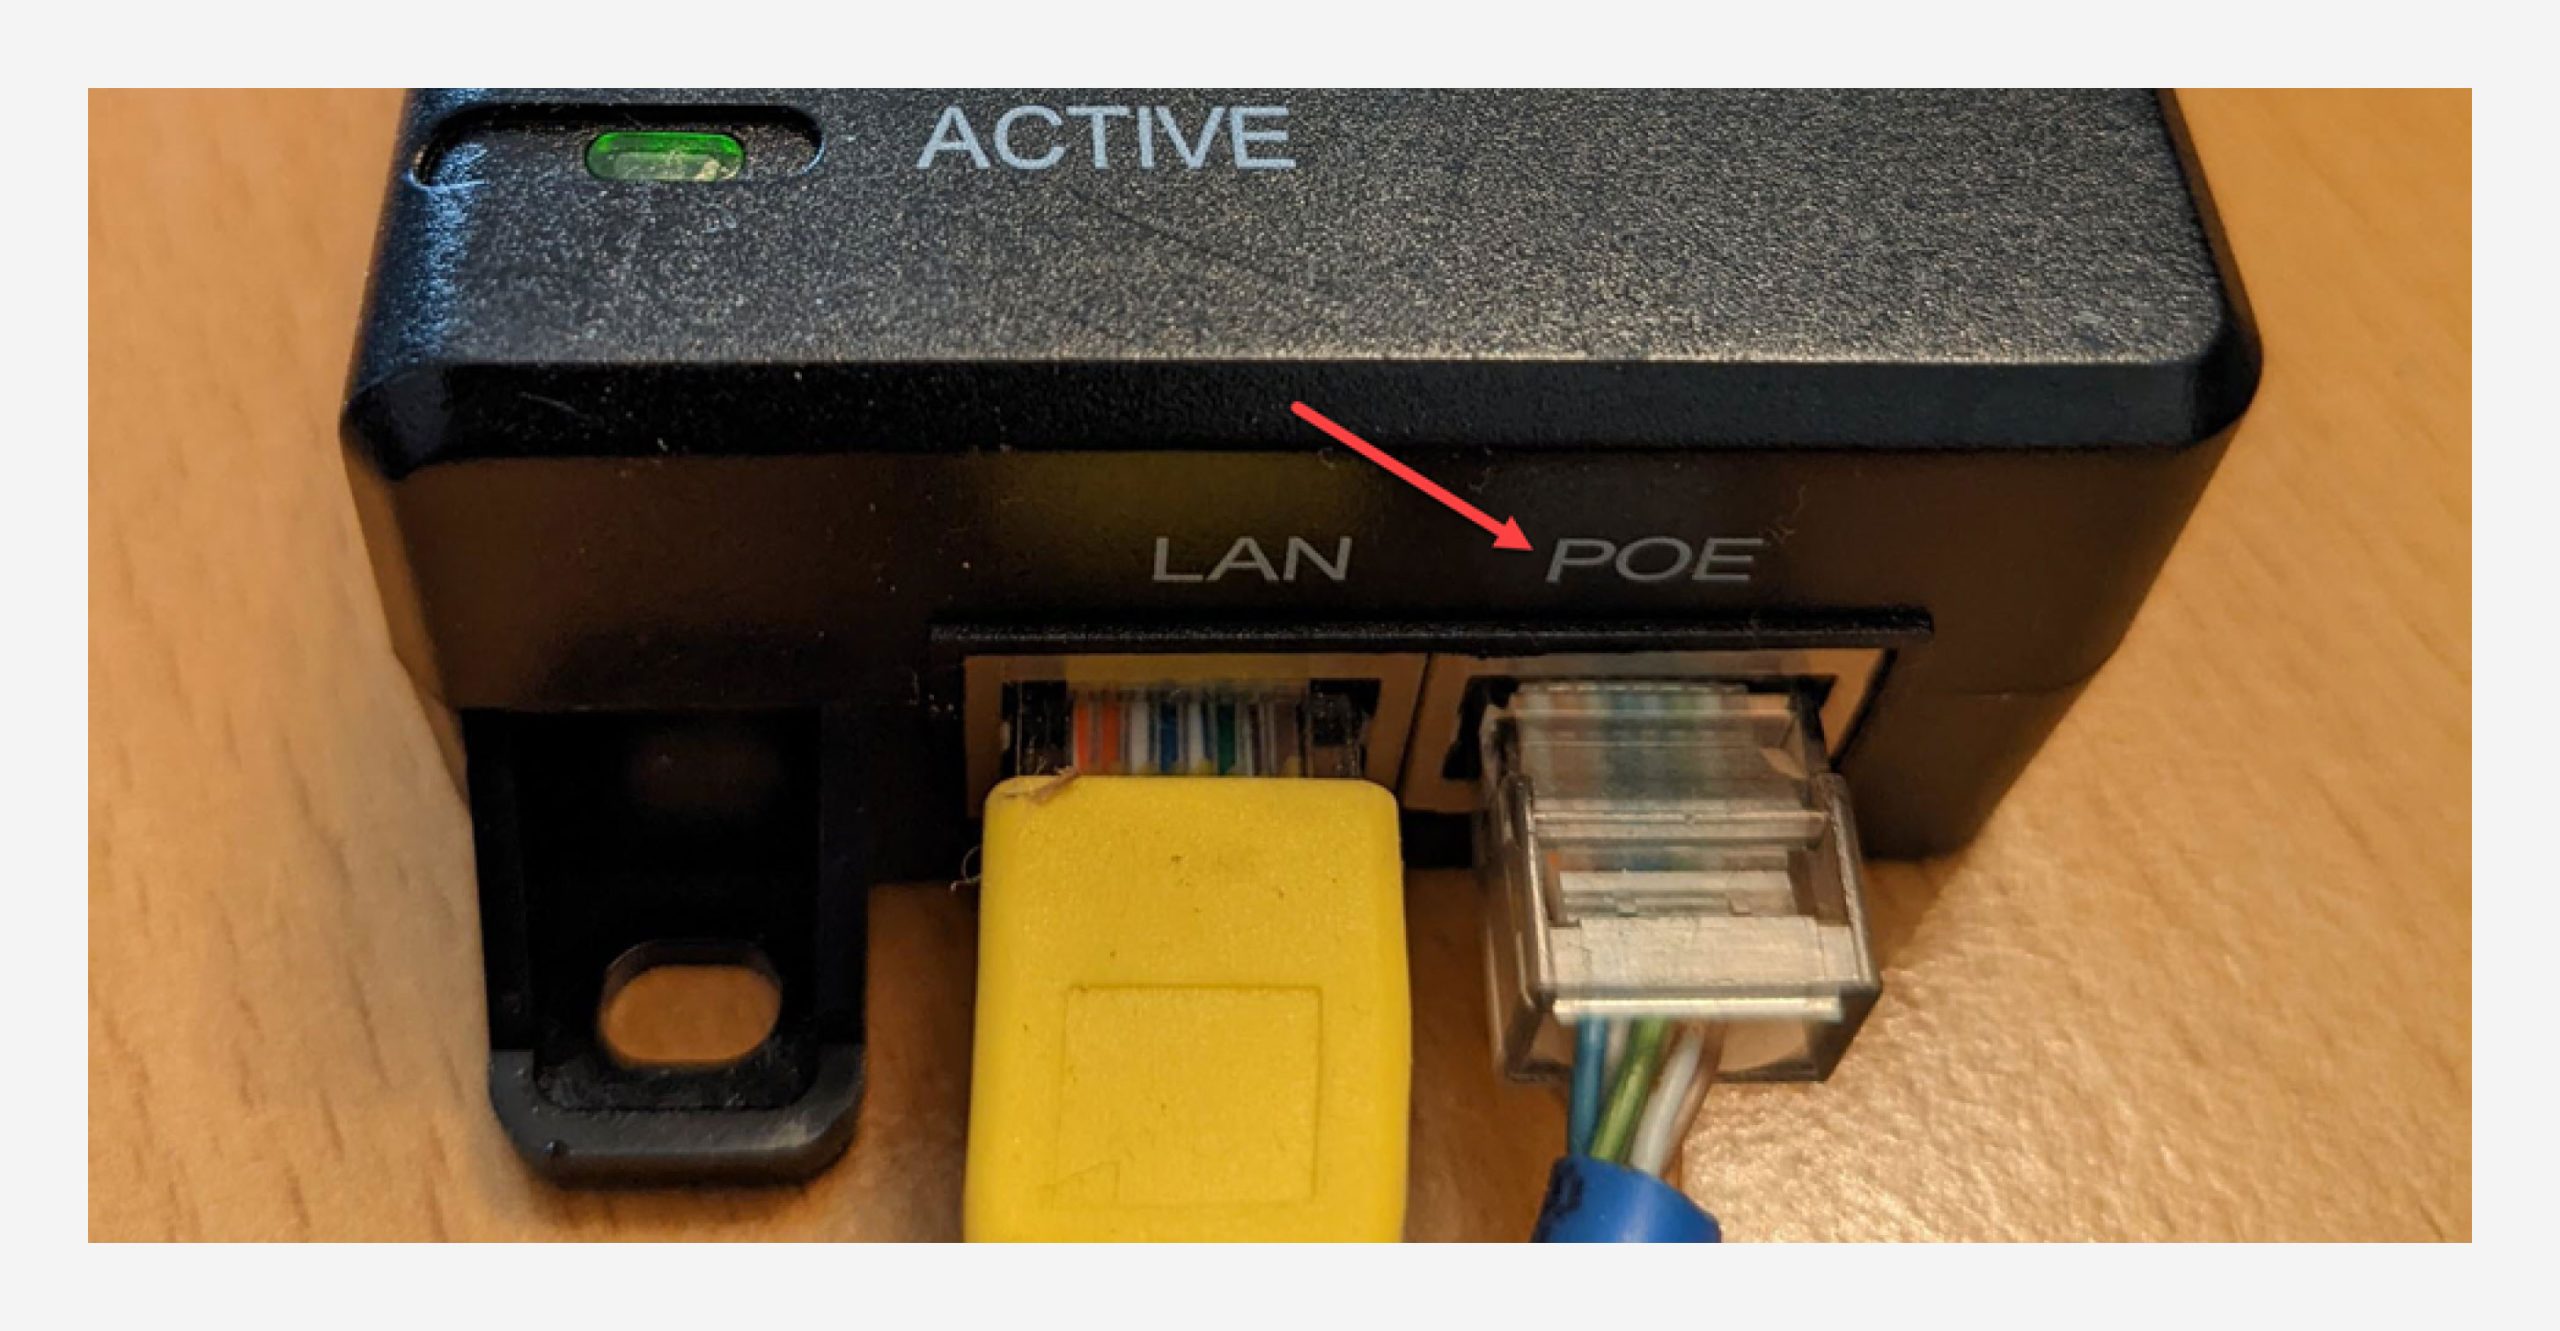
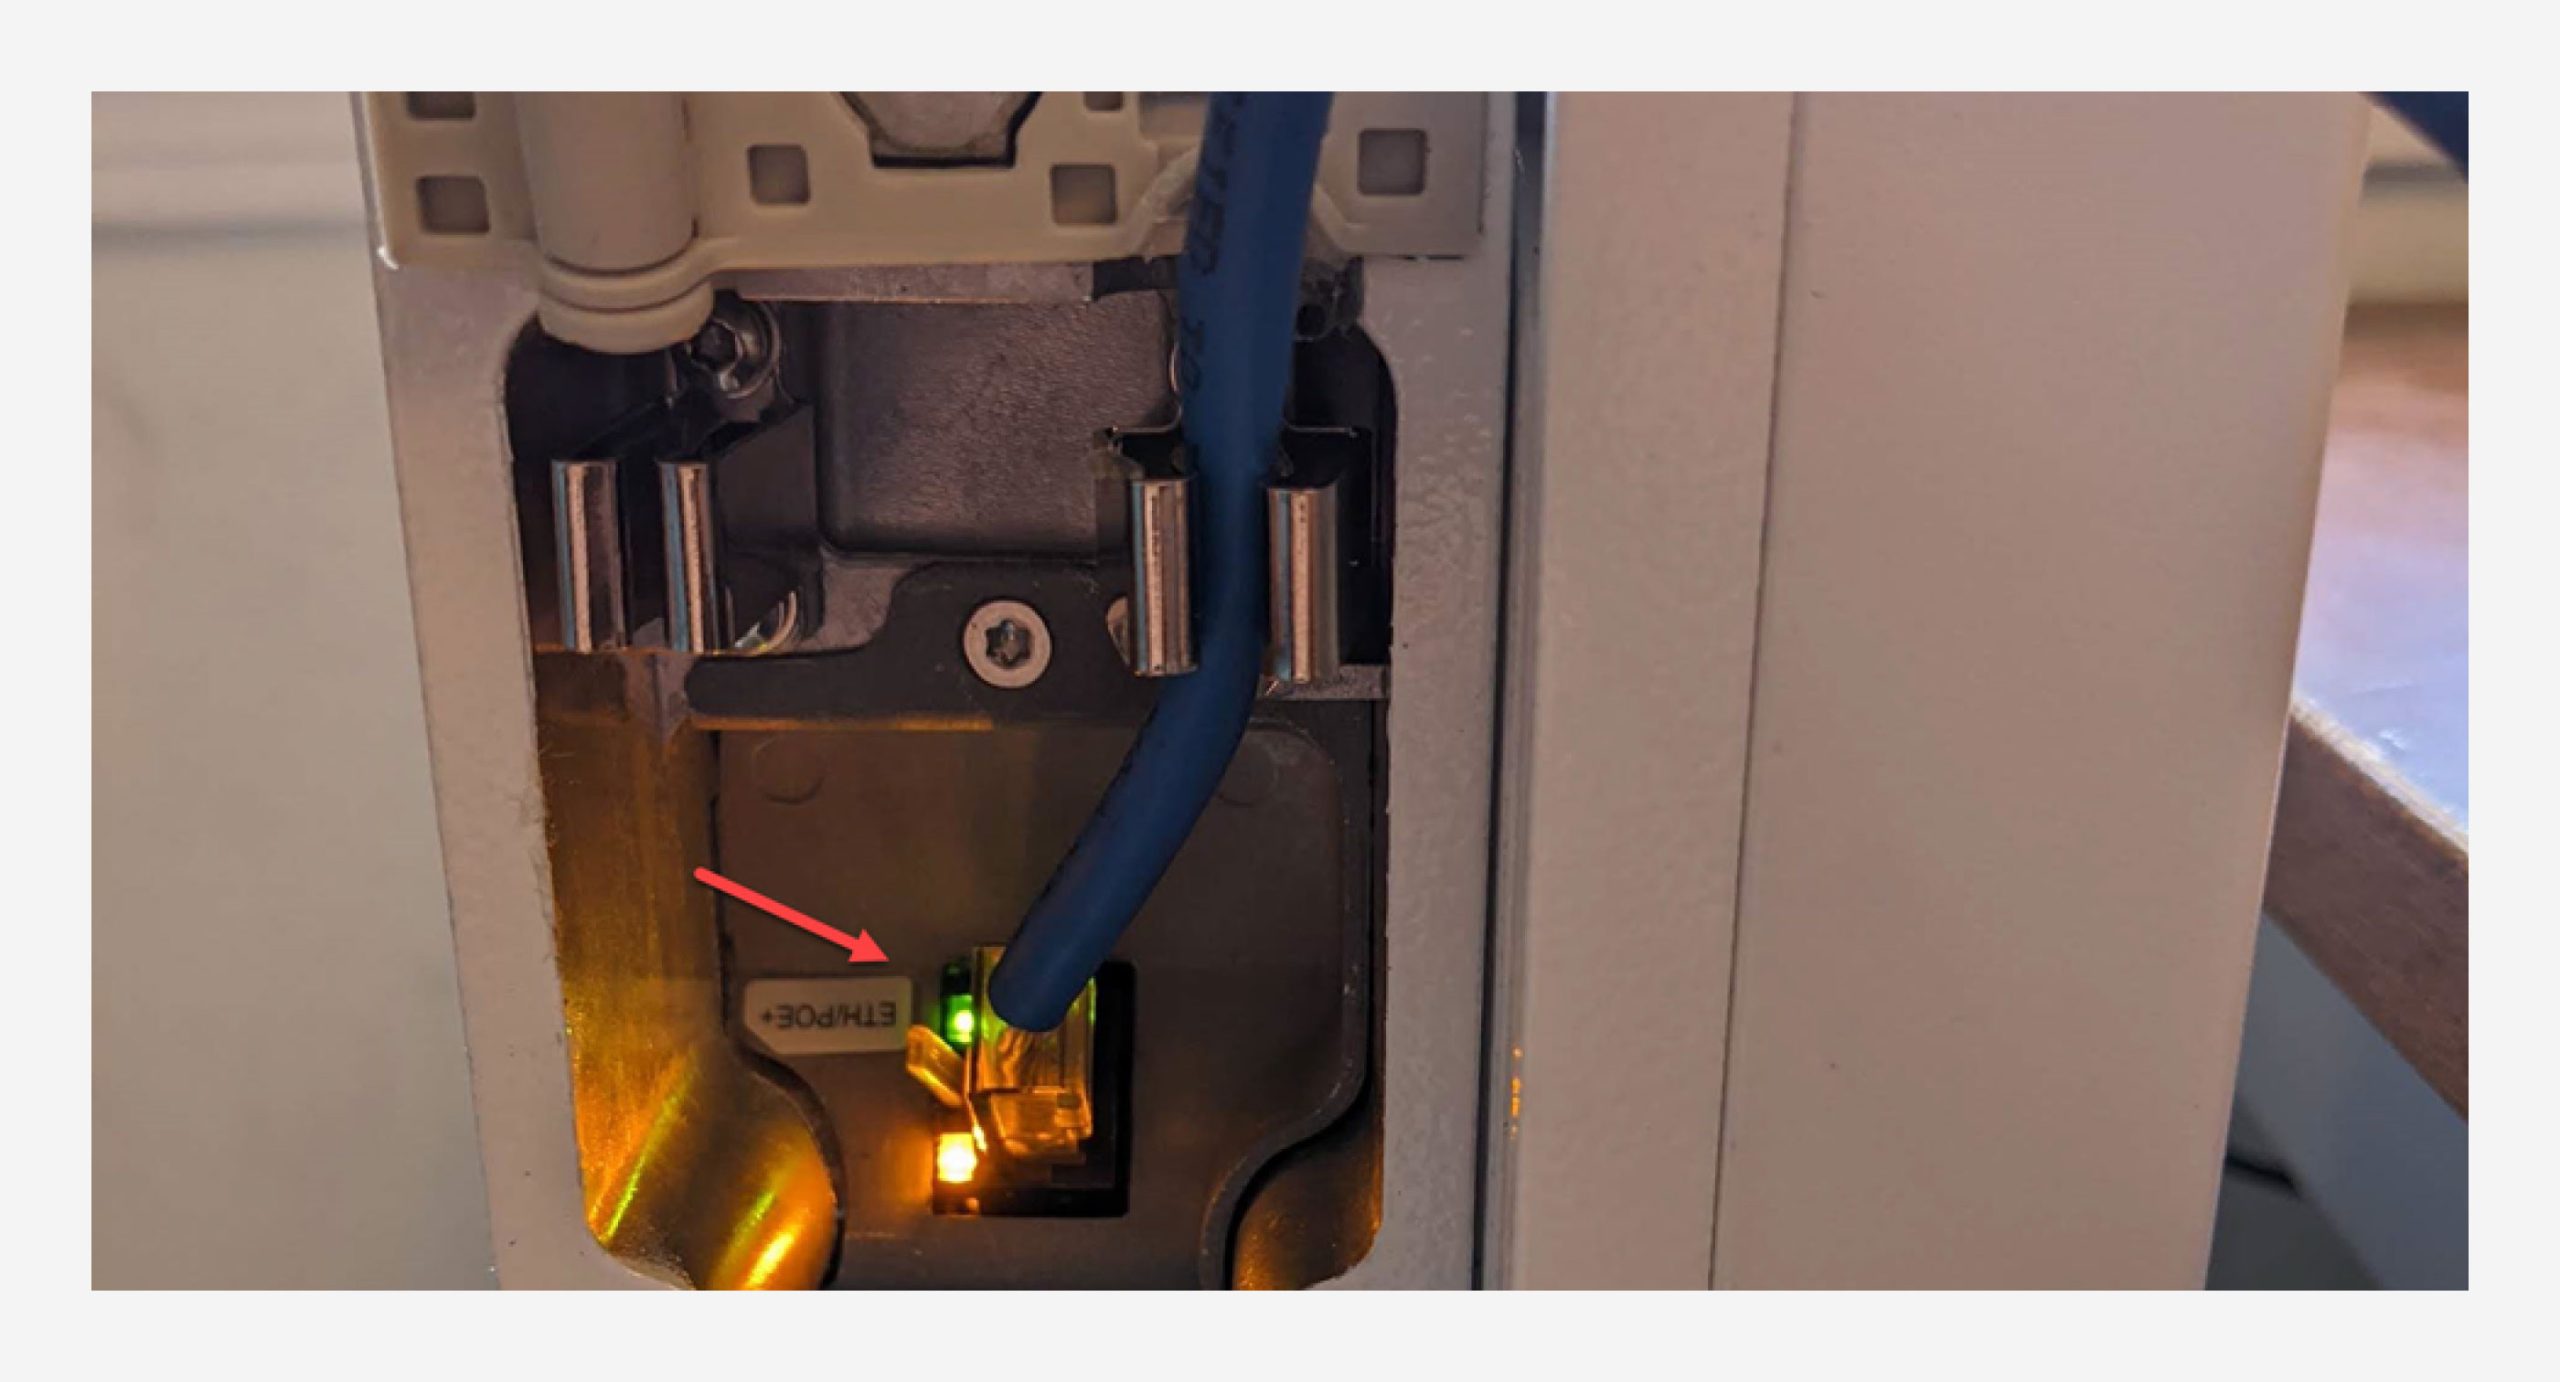
Step 1 – Connect POE+ Injector
Connect the included POE+ Injector to a wall socket or a UPS. Extension cords(especially daisy-chained) are not recommended.
Step 2 – Connect Ethernet cable to POE+ Injector
Step 3 – Connect the Ethernet cable to the Gateway
Step 4 – Connect POE+ Cable to the POE+ Injector

NOTE: Ethernet cables must be 330ft/100m or less in total length.

Here is an example: Outdoor Rated Cable

WARNING! Ensure that you are installing your POE in a watertight enclosure/environment and that water is unable to travel down the CAT cable and into your POE. This can cause permanent damage which is not covered under warranty.

Step 5 – Connect POE+ cable to the Outdoor Small Cell
Step 6 – Verify Connectivity status

Visit the small cell dashboard using:http://freedomfi-gateway.local

Outdoor Small Cell Install and Registration

Location Selection

To start, make sure you select a good place for the Outdoor small cell. Obstructions will decrease coverage. CBRS signals have less range than LoRa. Similar to Wi-Fi they can be weakened or blocked by obstacles like walls, trees, and buildings. To capture the most data you can, you want your small cell to point towards a populated area, a place with a lot of people and phones e.g. a park, a playground, an outdoor cafe/coffee shop.
For purpose of improved coverage area, it is recommended to mount your outdoor small cell as high up as reasonably possible. This often means on a roof, or near the roof line of a building. Roof mounting examples for a home or small business:

Requirements: The outdoor small cell will require installation CPI approval before it can go on air and allow users to connect. The CPI process requires the following:

NOTE: How to get and submit this information along with sample photos will be covered in the small cell registration section below.

Small Cell Registration

To enable the outdoor small cell, you’ll need to complete the CPI flow and get approval. The process starts with registering the small cell location.
To register the outdoor small cell, you’ll need the following information along with photos to prove it.
Step 7 – Recording Height
You will be required to submit the height of the installation and a photo to verify it. Here are some ideas on how to get the height:
Take a photo that shows the radio and the ground. Sample Verification photo:
Step 8 – Recording Azimuth Angle
Azimuth is a fancy name for the compass direction in which the center of the antenna is pointing. Please utilize the free NOAA Mobile Magnetic Declination calculator for this measurement.
The sample picture is showing azimuth angle of 109 degree.
Caution: CPI submissions utilizing any apps/tools other than the NOAA Mobile Magnetic Declination to calculate the Azimuth or CPI submissions with location services disabled on NOAA will be rejected.
Step 9 – Recording Elevation Angle
The elevation angle is a fancy name for “is it pointing up or down from level.” The reference point is the middle of the antenna. To ensure consistency across all applications, we ask that you please utilize the following free app to measure & record your elevation accurately.
Bubble Level
Steps to collect this photo:
The sample image is showing 3 degrees of down-tilt angle using the Bubble Level app.
Caution: Ensure you are placing your phone directly on top of the flat portion of your 430H small cell exactly as seen in the sample photo and utilizing the recommended apps, failure to do so will result in CPI rejection
Step 10– Register small cell
Now that you have the small cell information and photos, you will need to submit them for CPI approval. Access the small cell dashboard by pointing your web browser to http://freedomfi-gateway.local from a device on the same network as the FreedomFi Gateway.
You will be notified by email with the status of your submission within 3 days.
Step 11 –Verify small cell is Online
Once you get the CPI approval notification, your small cell should be ready to go. To check, navigate to the small cell Dashboard and verify that the registration status is approved, and the statuses are all Green.
Step 12 –Connect a mobile device to the Radio

FreedomFi SIM cards can be used to connect to and use your mobile devices with your network. The FreedomFi SIM card setup guide and verified device list is here.

Stuck? 

Appendix - Troubleshooting Small Cell Status
To access the local dashboard, point your web browser to http://freedomfi-gateway.local from a device on the same network as the FreedomFi Gateway.
Click on Radio Dashboard.
Did you make a $100 waitlist reservation in the past? Please check below to redeem your waitlist code for a discount.

Waitlist Status

Subscribe Now

Subscribe Now (Helium5G)

Please subscribe below to learn about future announcements related to FreedomFi Gateway release.